Flexxible|SUITE uses labels assigned to virtual machines to determine the kind or type of a VM: a desktop, an infrastructure server, a desktop template definition, etc.
Setting the VM type in Flexxible|SUITE
These labels or tags can be assigned to VMs in the VM Manager (System Center Virtual Machine Manager, VMWare vSphere web client, XenServer) and also from Flexxible|SUITE through the "Set VM type" menu option:
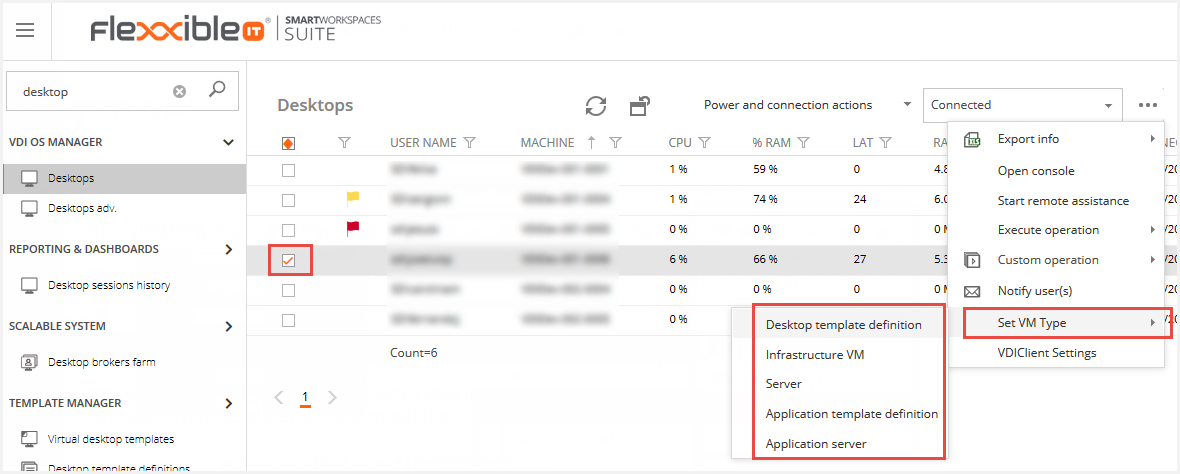
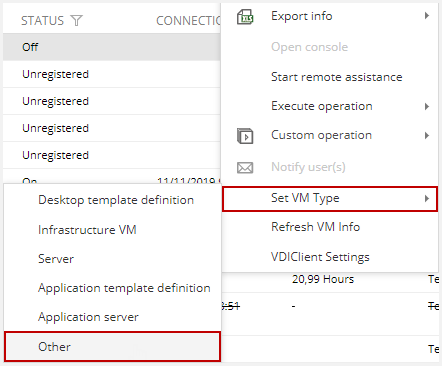
This menu option is displayed in the different lists of VMs in Flexxible|SUITE (Desktops, Servers, Desktop template definitions, Application template definitions, VCC Roles, etc.) and the possible values in the menu can be any except the one corresponding to the list being displayed, so the operator can assign a different VM Type on the selected row.
When the VM type is selected by using the menu, a job is automatically enqueued that will update the VM tag in the VM Manager and in the Flexxible|SUITE database.
These are the different tag values supported by Flexxible|SUITE:
| Description | Value (tag in VM Manager, case-insensitive) |
|---|---|
| Desktop template definition | MasterImage |
| Application template definition | AppServerTemplate |
| Infrastructure VM | Infrastructure |
| Server | SecureServer |
| Application server | AppServer |
| Desktop | (empty, no value) |
| (Excludes the VM) | Unknown |
You must add the tag Other to exclude the VM from Flexxible|SUITE. Please note that once the tag is changed the management of this VM could not be done through the SUITE.
Setting the VM Type in the VM Manager
This is how the VM Type tag can be set in the supported VM Managers:
XenServer
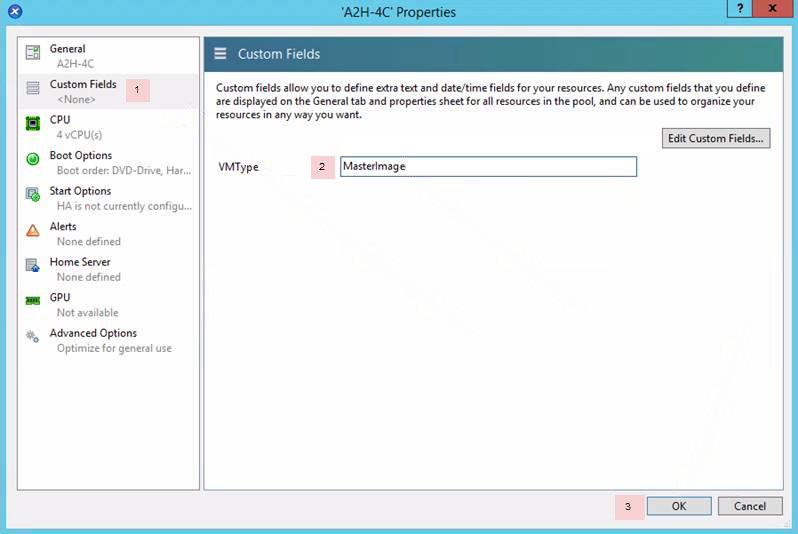
In the VM properties, use the Custom Fields category to set the VMType custom field with the appropriate tag value and click OK.
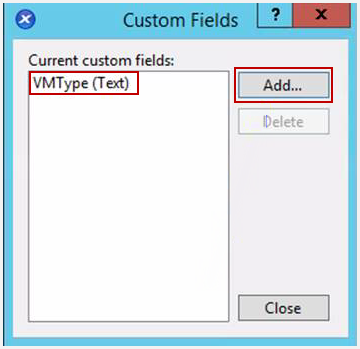
If the VMType custom field doesn't appear, just create it by clicking the "Edit Custom Fields" button and then the "Add" button to add a new VMType custom field of type "Text".
System Center Virtual Machine Manager
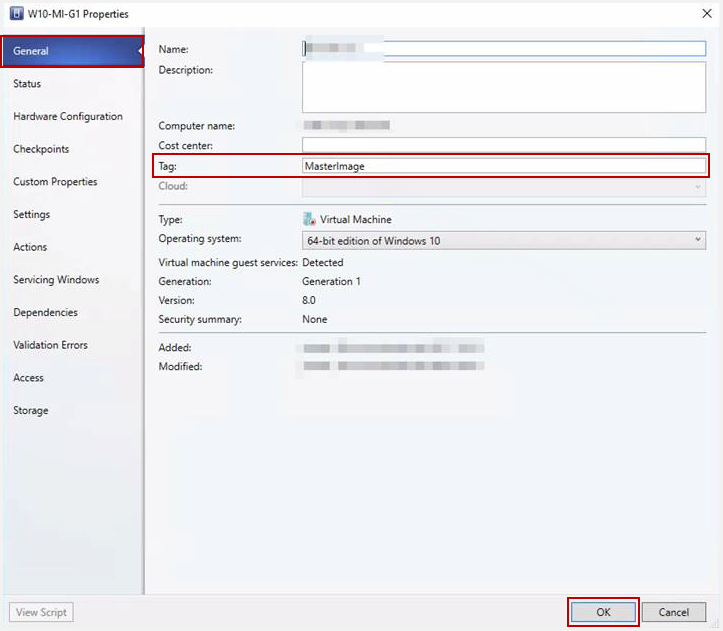
Open the VM properties and set the "Tag" field value in the "General" category. Then click Ok.
VMWare vSphere Web Client
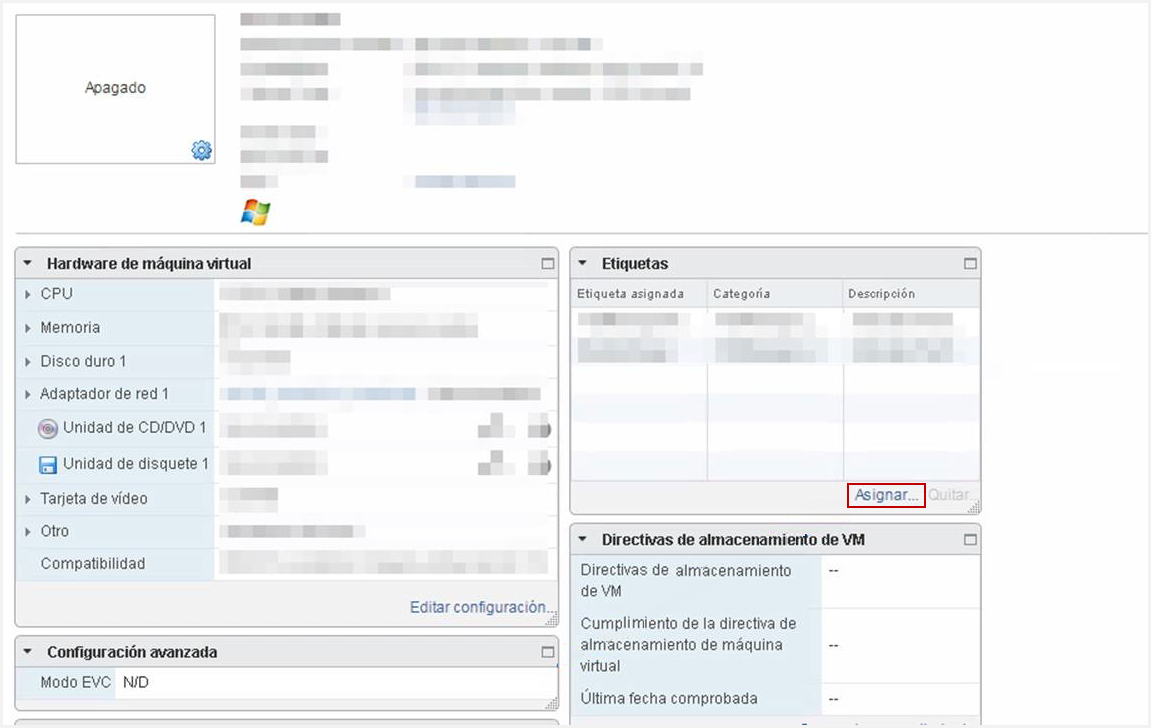
Select the VM and in the Summary tab, press the "Assign" button in the Tags section:
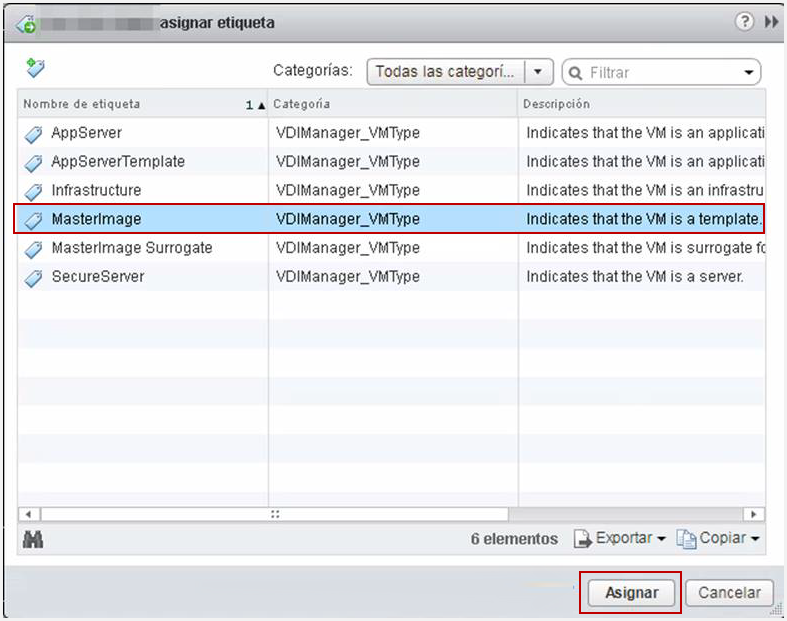
Select the appropriate tag from the "VDIManager_VMType" category and click the "Assign" button:
Azure
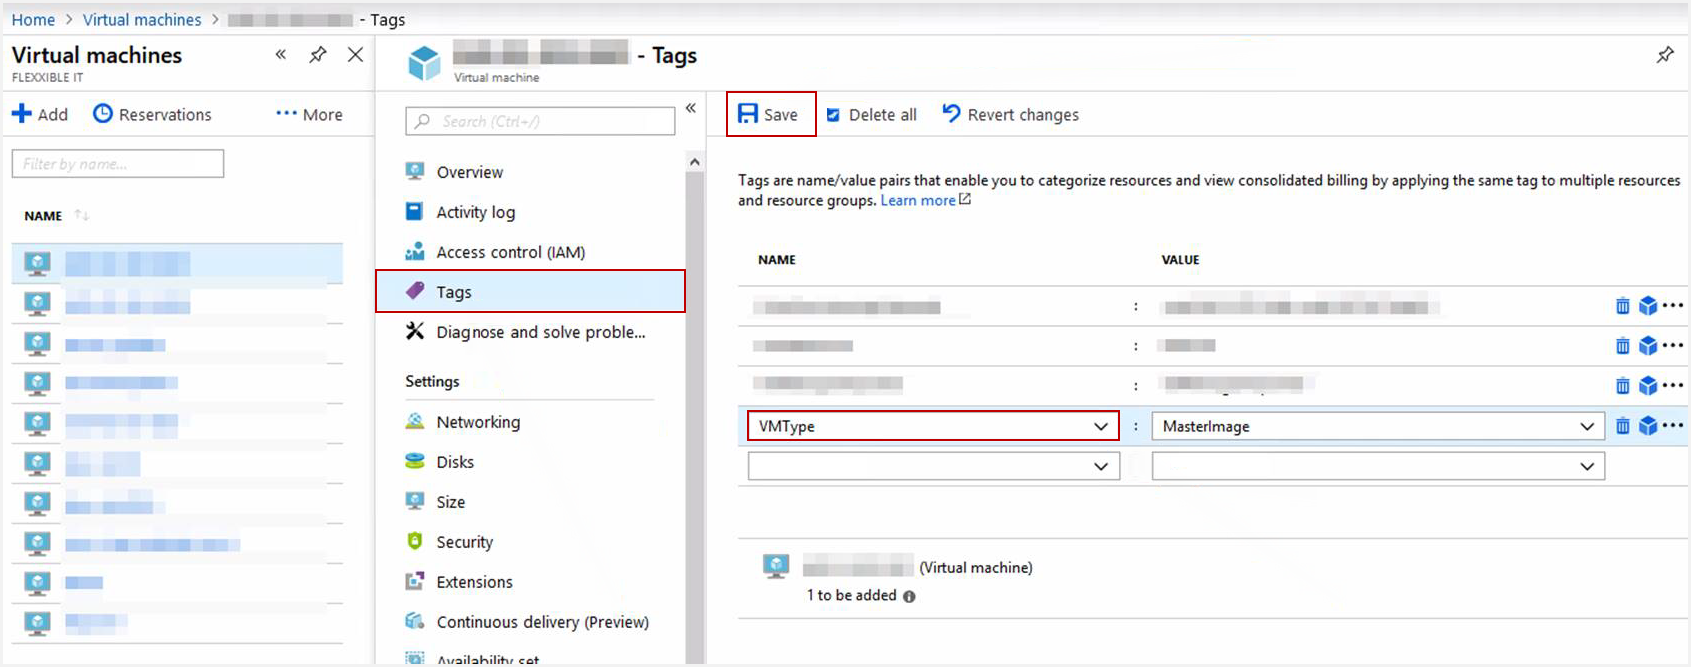
Select the VM and then the "Tags" category. Assign a tag Name "VMType" and then the appropriate value and press the "Save" button:
Replicas
In Virtual Machine Manager, it is not possible to assign a tag to a replica (VM). Using the subfixes -rep or -rep2, the replica will be ignored and it won't be being imported as a desktop. This way Flexxible|SUITE will not import them and don't will be registered as desktops.