The Virtual desktop templates functionality allows an authorized user to deploy new Virtual Machines over an existing template by assigning the template to new users and groups. It’s also the entity responsible for keeping the relationship between the different Citrix elements involved in the deployment and the delivery of the Virtual Machines (catalogs and delivery groups).
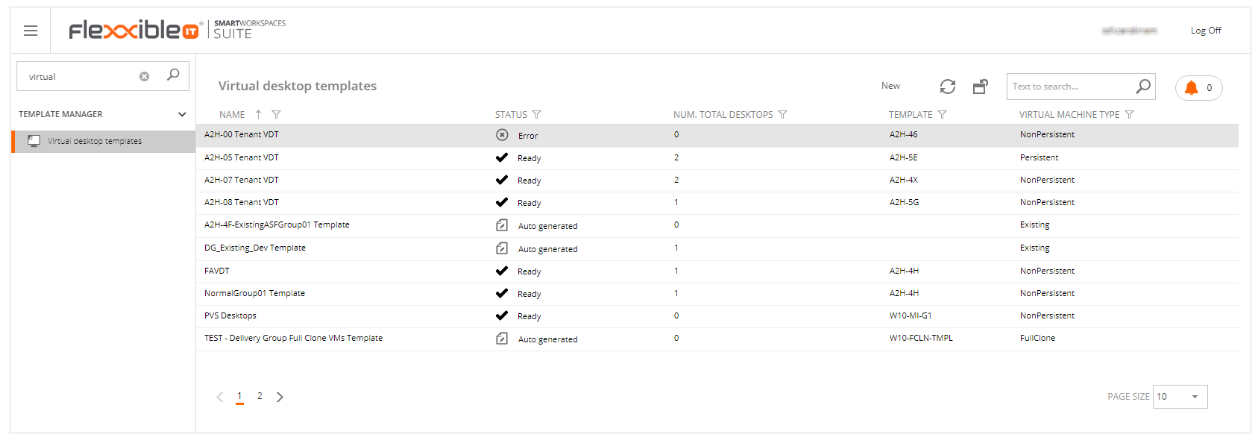
In this screen, you can see:
- The name of the virtual machine.
- The current VDT status, which shows if the VDT is ready or not. The different states are:
- Ready: the VDT is up to date without pending changes.
- Changes pending: the VDT is still not deployed with the latest performed changes.
- Error: there has been a problem to apply any change.
- The number of desktops created within the templates associated with them.
- The template, on which the VDT is based on.
- The virtual machine type shows the type of VDA installed in the template.
By selecting a particular Virtual desktop template(VDT), we can access its details info:
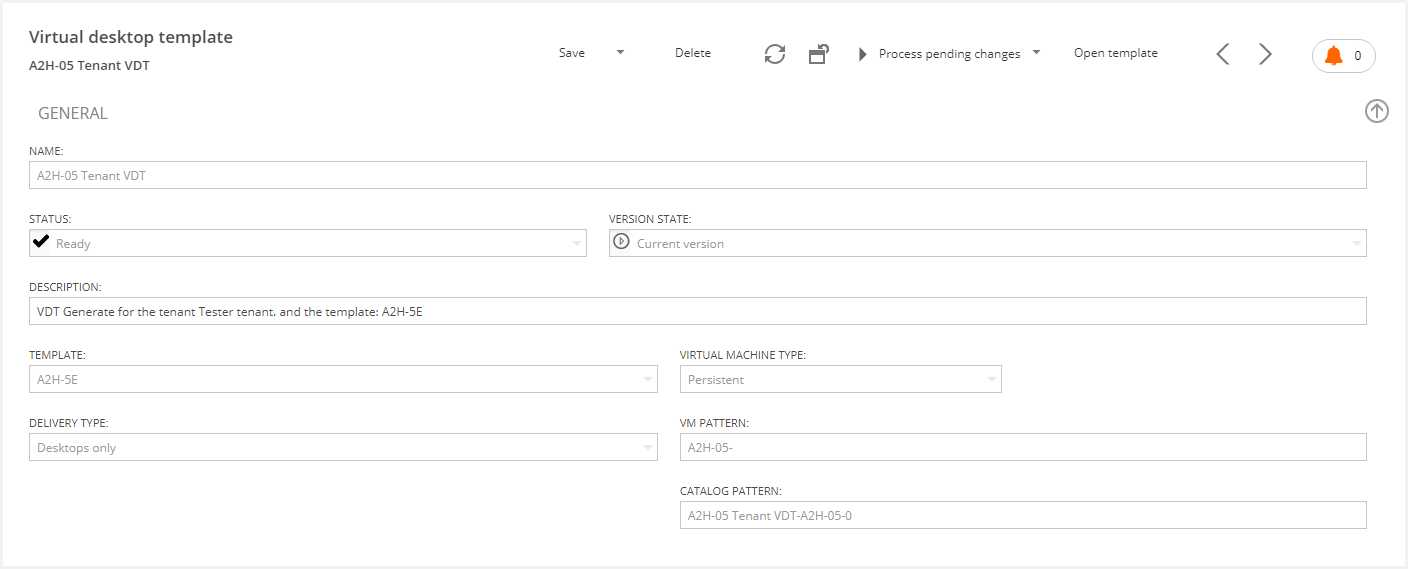
In the GENERAL section, we can see
- The VDT name.
- Its own status.
- The version state.
- A VDT description.
- The template associated with this VDT.
- The type of desktops available.
- The VM pattern: This is the pattern used to name the created desktops based on the below logical rules. The VM pattern consists of a descriptive text, the number of virtual machines, and the number of catalogs:
- Descriptive text. It should include 7 characters in case you don't want to specify the number of VMs and the number of catalogs. It should include 15 characters if you want to provide the number of VMs and the number of catalogs.
- Include hash sign(s) "#" to specify the number of VMs based on the following logic:
- If you want the amount of created VMs to be limited to 10 (Only 0 to 9 machines can be created), use one # sign.
- If you want the amount of created VMs to be limited to 100 (Only 0 to 99 machines can be created), use two # signs.
- If you want the amount of created VMs to be limited to 1000 (Only 0 to 999 machines can be created), use three # signs.
- Include % signs to specify the number of catalogs based on the same logic applied to the number of VMs using the # signs.
- Examples:
- if for instance, I specify the following text pattern, "Text-###-CAT%" in the VM Pattern field, 1000 VMs can be created from this VDT..i.e, Text-000-CAT1, Text-001-CAT1,... Text-999-CAT1.
- If I only specify 7 characters(CCCCCCC) in the VmPattern field, excluding the # and the % signs, the default pattern to be applied will be CCCCCCC-####-%%% (15 characters in total).
- Catalog Pattern: This is the pattern used to create the Citrix catalogs.
If Catalog pattern filed is left empty, it will be filled automatically using the VM pattern.

In the following section we can find five Tabs:

Delivery Groups: In this section, we will be able to:
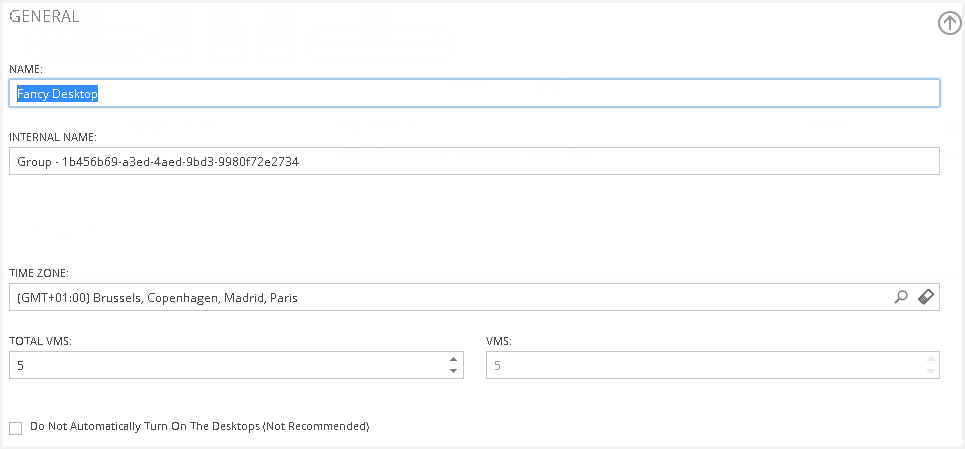
- See information about the VDT components as well as the total number of virtual machines. If we increase this number, new desktops will be deployed without any users or groups assigned to them. Similarly, if we decrease it, some desktops will be removed until the specified number is reached.

See a detailed report about the status of the VDT VMs, and also a button we can click in ("Show catalogs"), to see the catalogues included in the VDT.
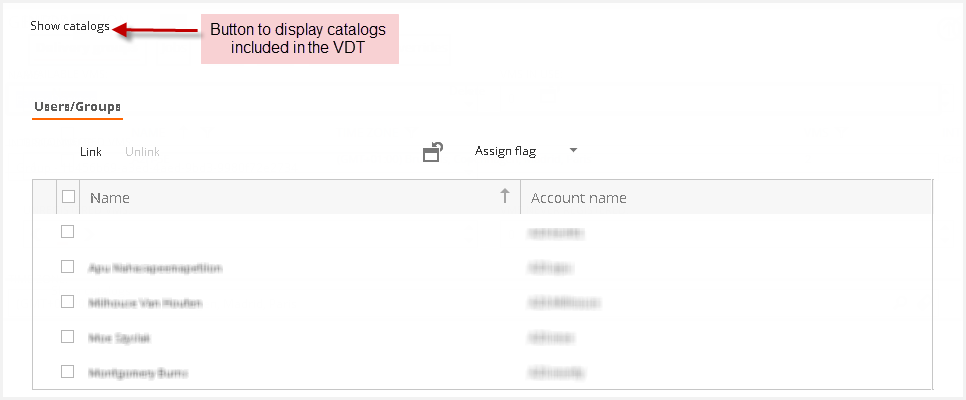
Please, refer to the catalog management article for more information.
In the Users/Groups tab, we can assign new users and groups by clicking on the "Link" button. On the other hand, you can also use the "Unlink" button to unassign the users and groups. The number of desktops will be increased/decreased in the same proportion that the number of users that are assigned/unassigned to/from the groups.
If we click on the “Jobs” tab, we will find information related to the "Jobs" console, which shows those jobs that have been executed either manually or automatically for this VDT:

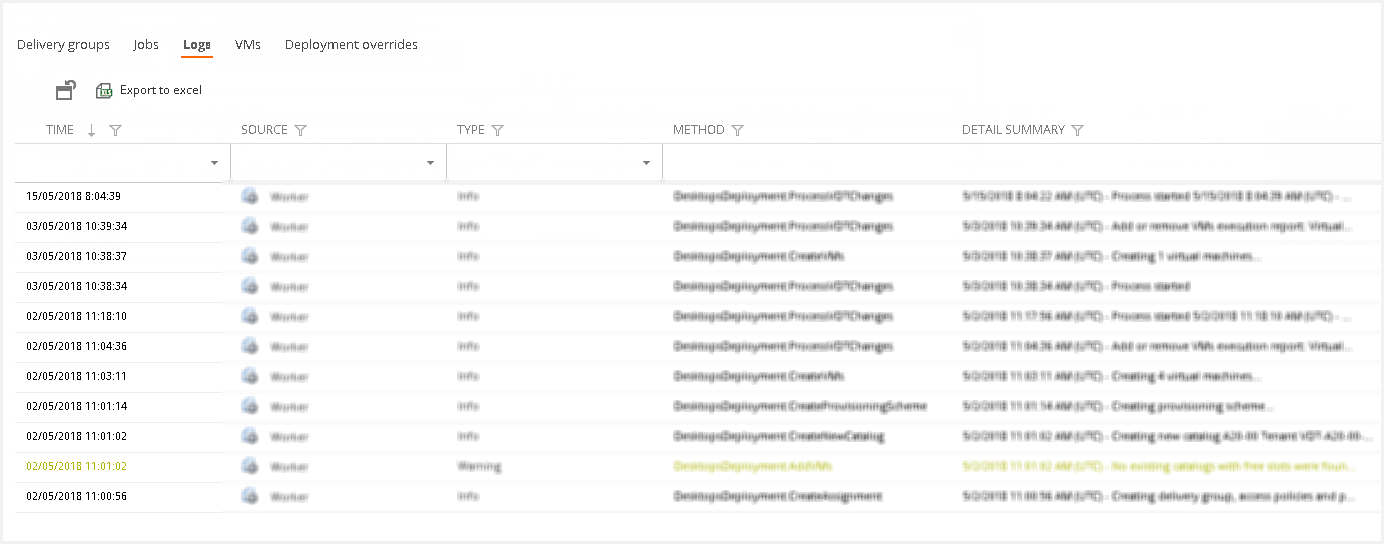
If we click on the “Logs” tab we can find the VDT record changes:
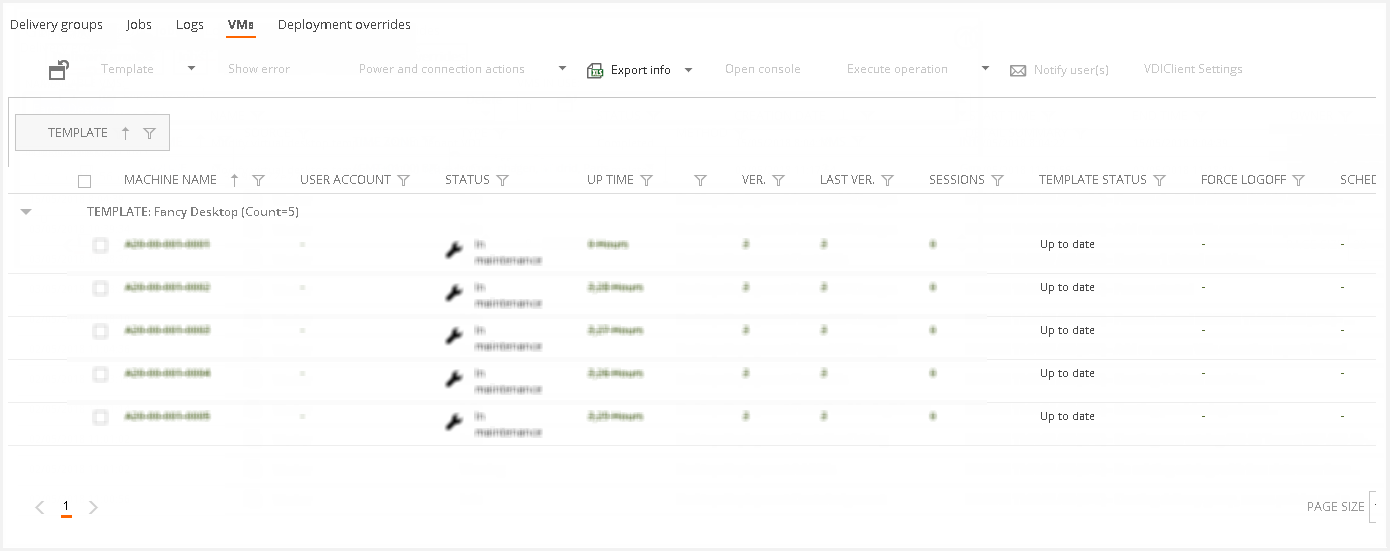
In the "VMs" tab we can see the desktops deployed from this VDT (if it was an appliance controller, we would see the infrastructure VM):
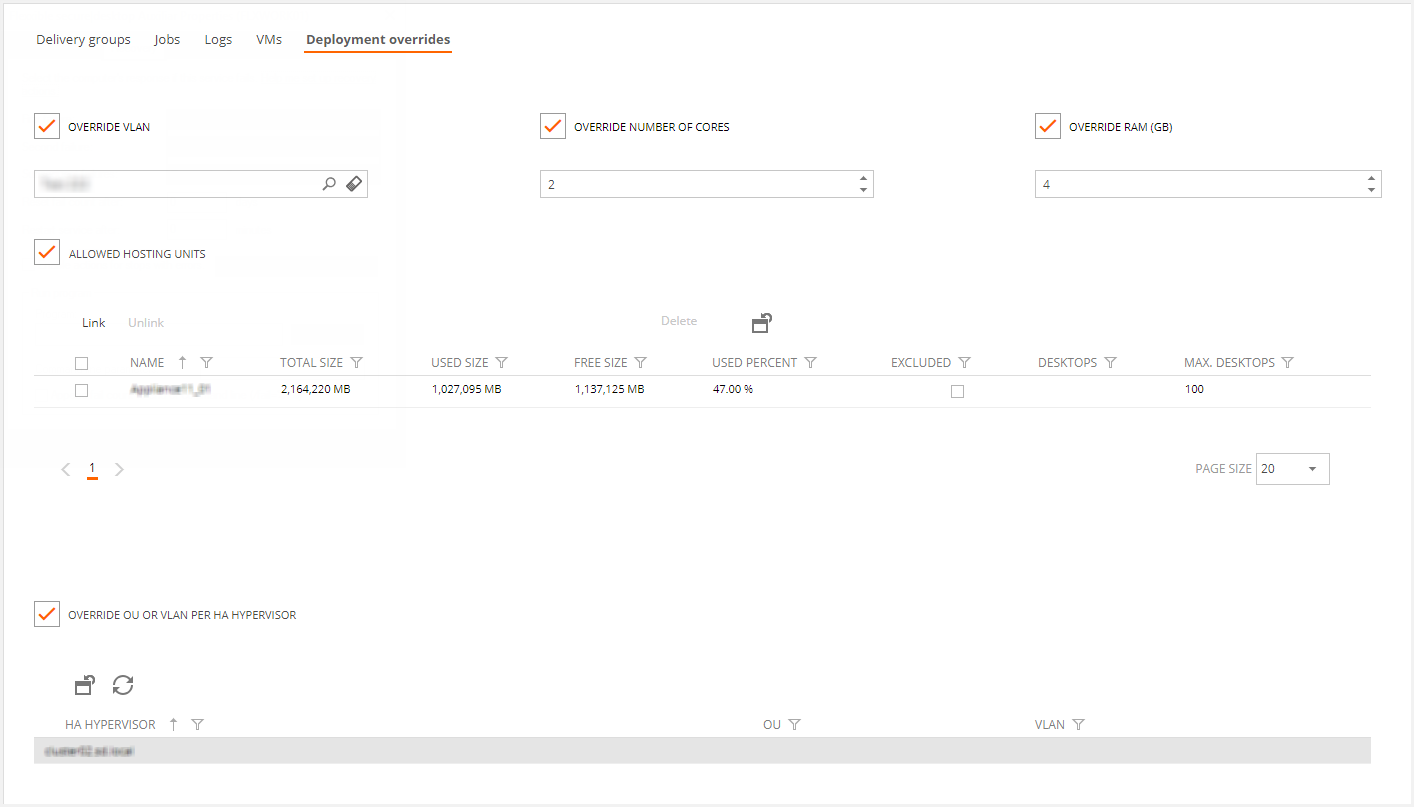
By clicking on the “Deployment overrides” tab we will be able to configure some resources for the new catalogs of this VDT:
Every time we make a change in this VDT, we should save it by clicking on "Save" and then on "Process pending changes" to apply it:

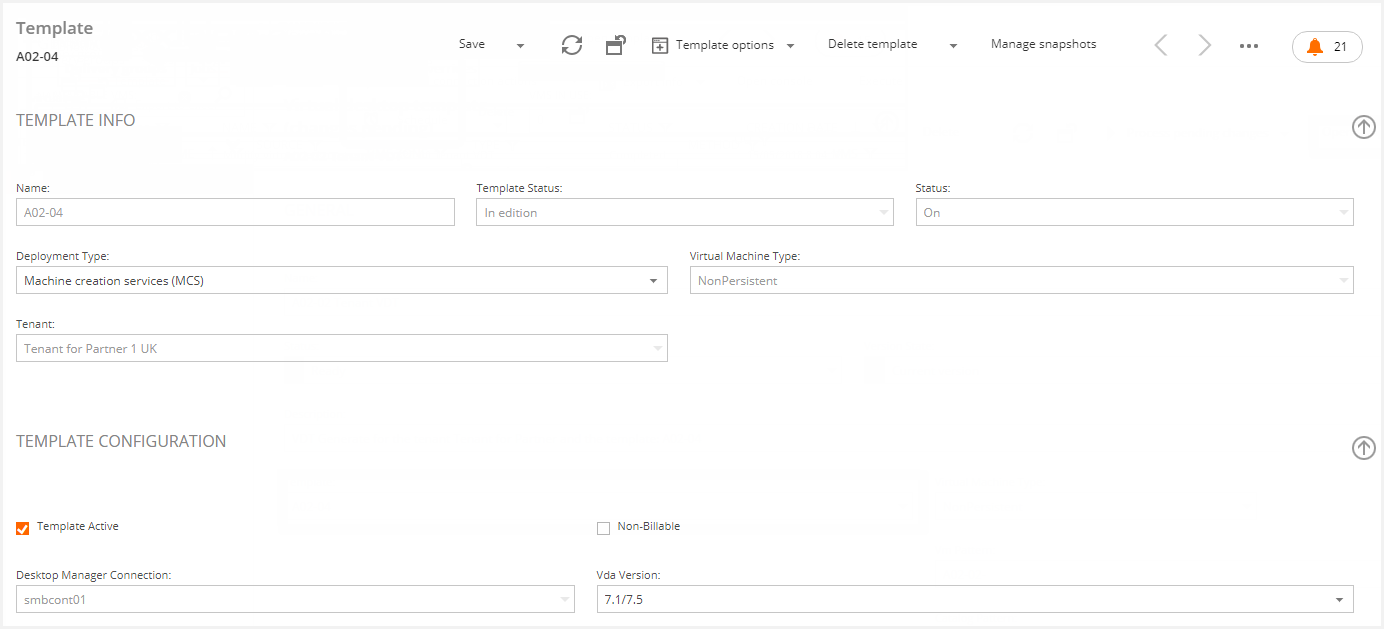
Since VDI OS Manager 4.0 version, the user can open this template definition from the selected virtual desktop template.

Click on the "Open Template" button and it will open the related template definition detail.
To set up the Azure subnets, storage account type and hybrid benefit support you must configure the following parameters:
- VMStorageAccountType: Specifies the Azure storage account SKU type to use for new VM catalogs. Possible values: Standard_LRS (default), Premium_LRS.
- EnableAzureHybridBenefit: [true/false (default)] Indicates if Azure Hybrid Benefit licensing will be used for new VMs.
The changes in these settings will be applied in the new catalogs, the existing catalogs will maintain the previous configuration.
From version 4.5, Flexxible|SUITE allows forcing waiting for computer account visibility when creating new VMs. You must configure the ForceCheckAdAccount setting.
If the setting is true, before adding the machine account to the catalog, checks that the account is visible from the Delivery Controller.
