Flexxible|VDI OS Manager is the only web console you need to orchestrate all of your infrastructure based on VDI, SDI and published applications, as through its over 20 modules it enables the integration and coordination of your entire infrastructure.
New Integrated Login Page
A smarter design and an improved portal to our solution have been included in the Flexxible 4.0 release based on MS Project Honolulu in order to follow the new standards when it comes to Servers Management and the majority of the frequently referenced tools used by system administrators.
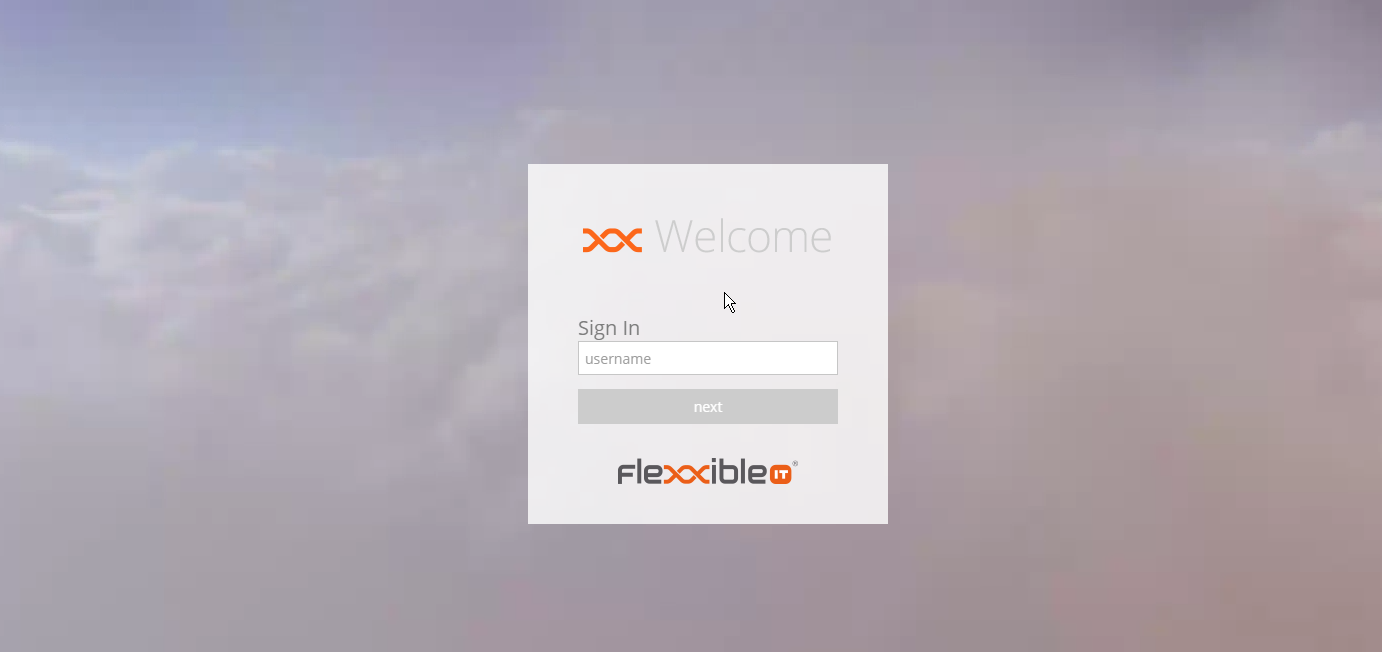
Also, we have upgraded the Flexxible login page. This is your entryway into Flexxible|Suite. You can get to all the main functions easily from here once you enter your credentials to continue to expand the products and services available.
When you log in to Flexxible|SUITE, you will get the new login screen:
Layout of the main screen
This section describes the items you will find on the main screen and their function.
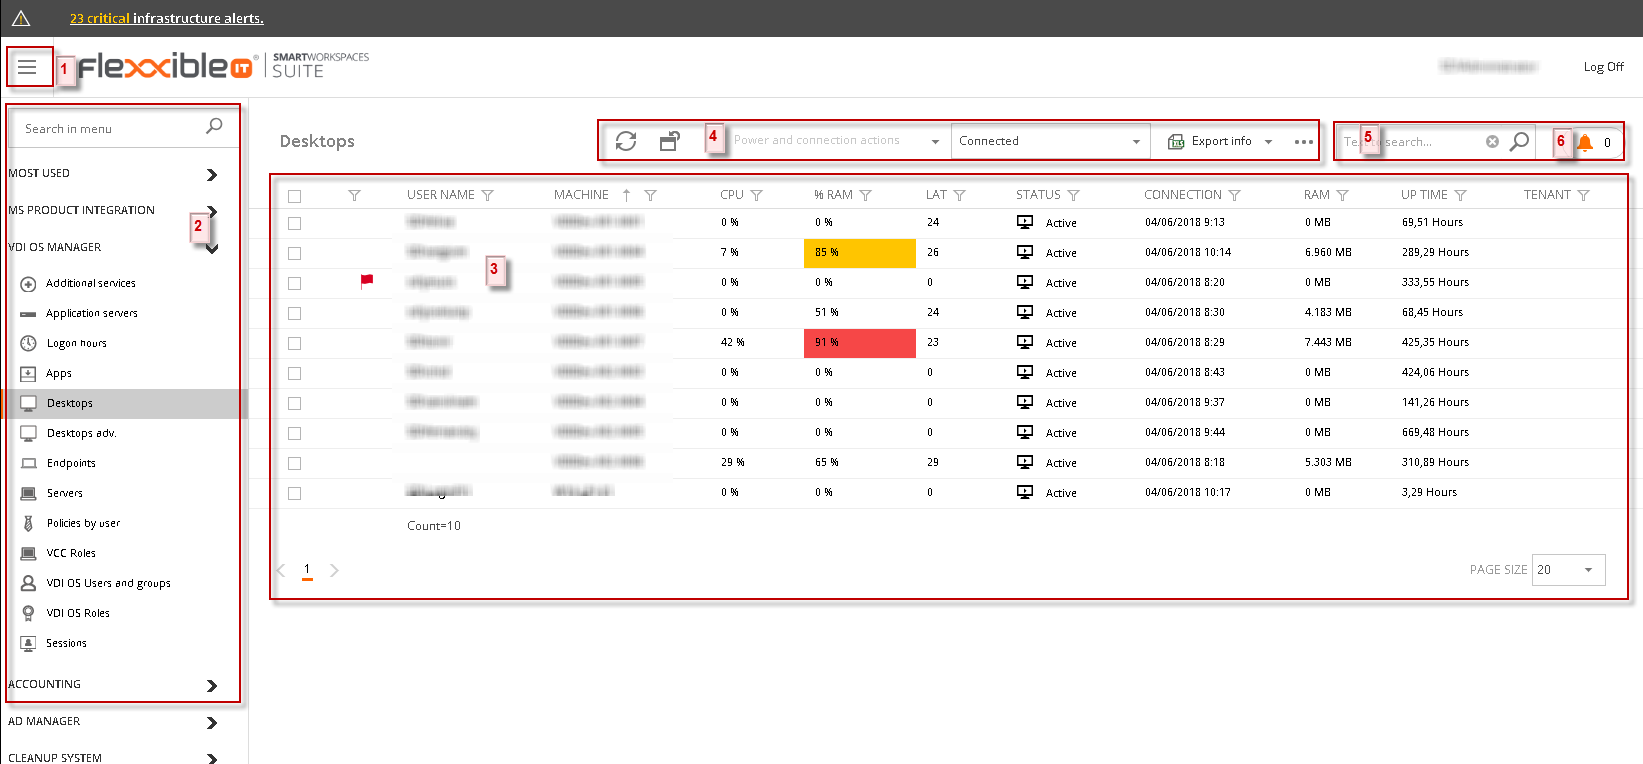
Drop-down menu
This icon enables you to show or hide the navigation menu so that the main screen can be expanded. It also shows a new message at the top of the page to inform the administrators when critical infrastructure alerts are currently active
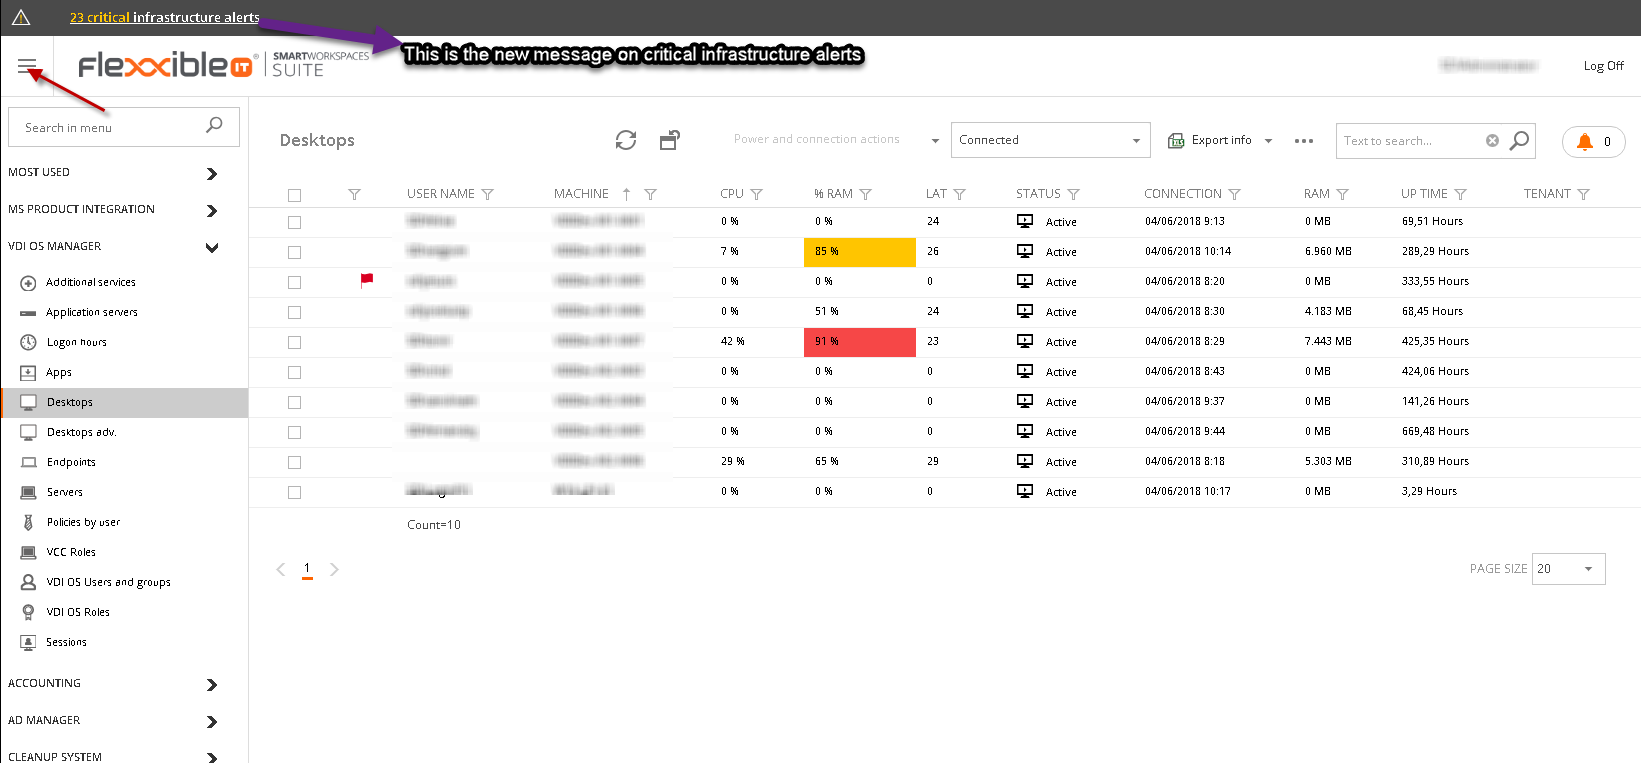
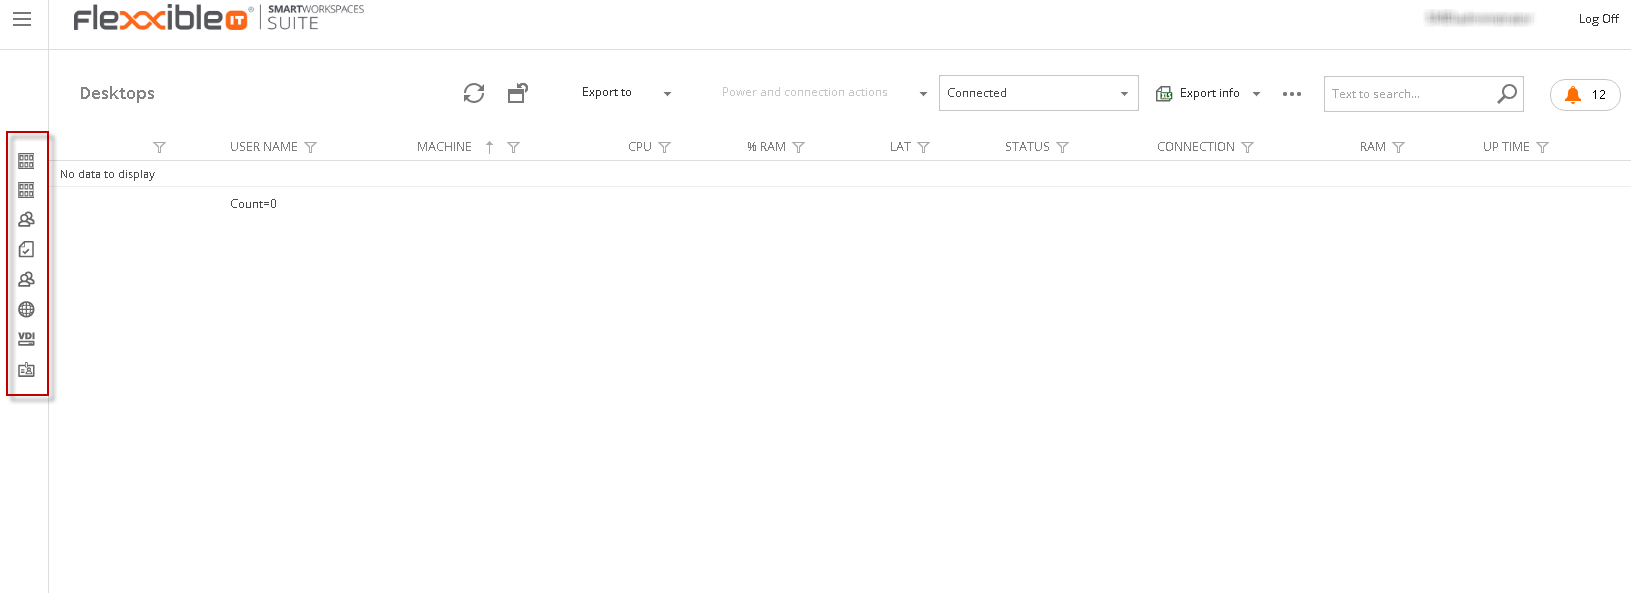
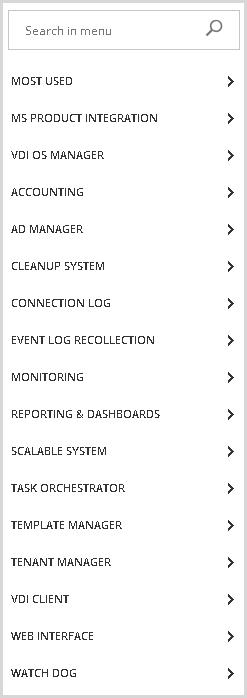
If the screen resolution is too low or if you access the interface from a mobile device, the left menu is automatically hidden. Press this icon as indicated by the red arrow in the above SS to display the menu as a pop-up list as shown below.
Navigation menu
This menu allows you to navigate to the various options in VDI OS Manager.
The options are shown in this menu depend on your current permissions and are divided into different groups (VDI OS Manager, Accounting, etc.).
A new feature not previously available in version 2.6 is that the menu options are collapsed by default. Right above the navigation menu, there is a search box that allows you to filter the menu options, automatically expanding the groups that contain items matching the applied filter.
Flexxible|Suite also has the new "My Company" menu option which redirects the user to its own tenant page. This is ONLY possible if a tenant has been assigned to the mentioned user.
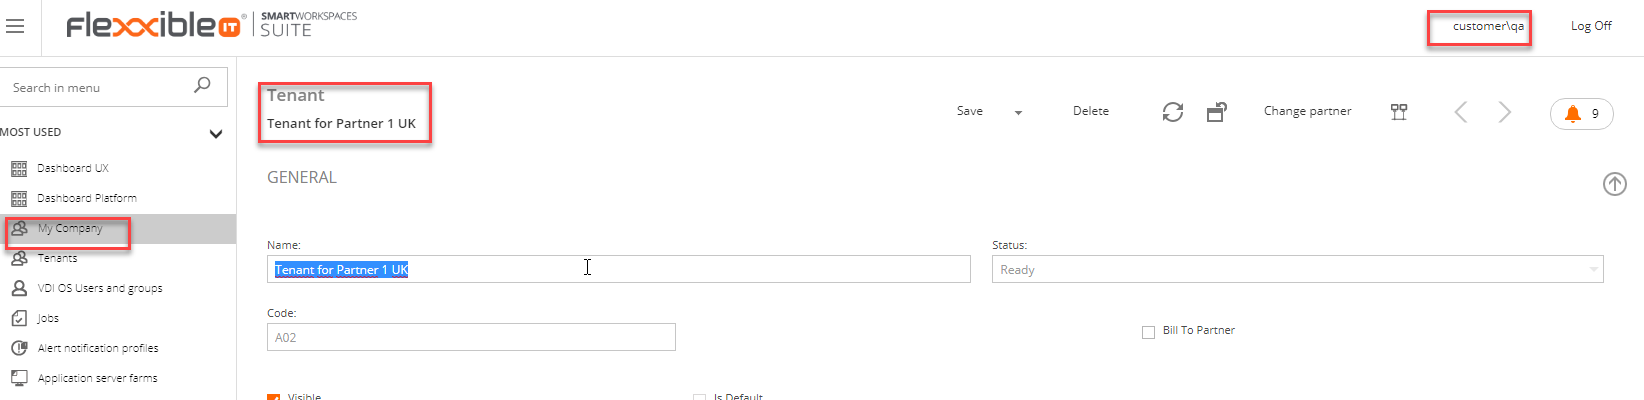
We will detail each section in the Navigation menu article.
Contents
Here the contents of the selected options are displayed. You have two types of screens, the list, and the details screens.
The usual VDI OS Manager flow consists of accessing a list including all the available elements and then accessing the details in which you are interested.
For example, if you click on the "Desktops" option, you will see a list containing all the available desktops, and if you want to see further information you can click on one of them.
Desktops list:
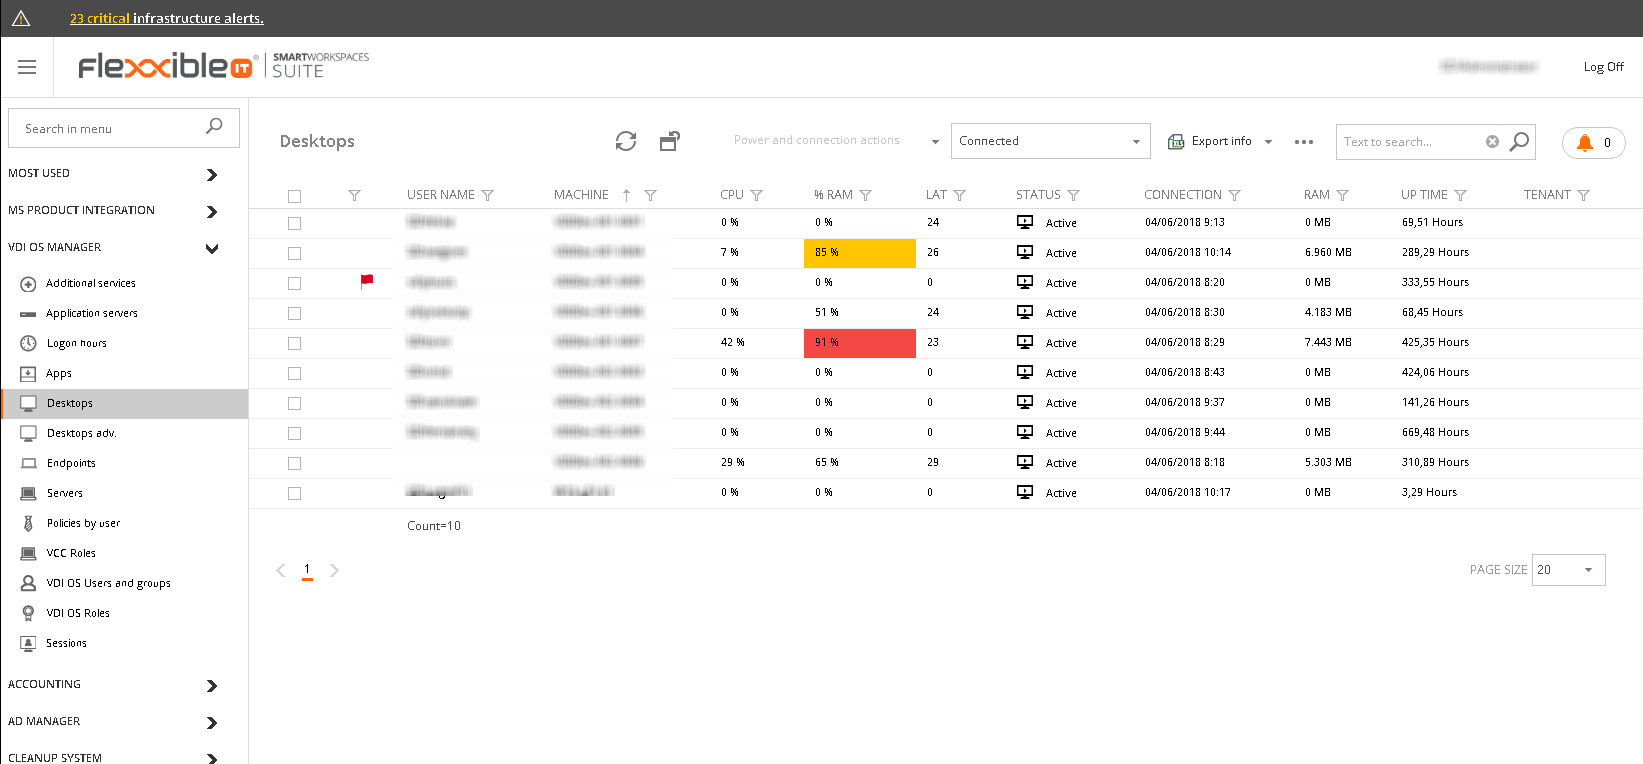
You can customize the lists as shows in the Customizing lists and Data Export article.
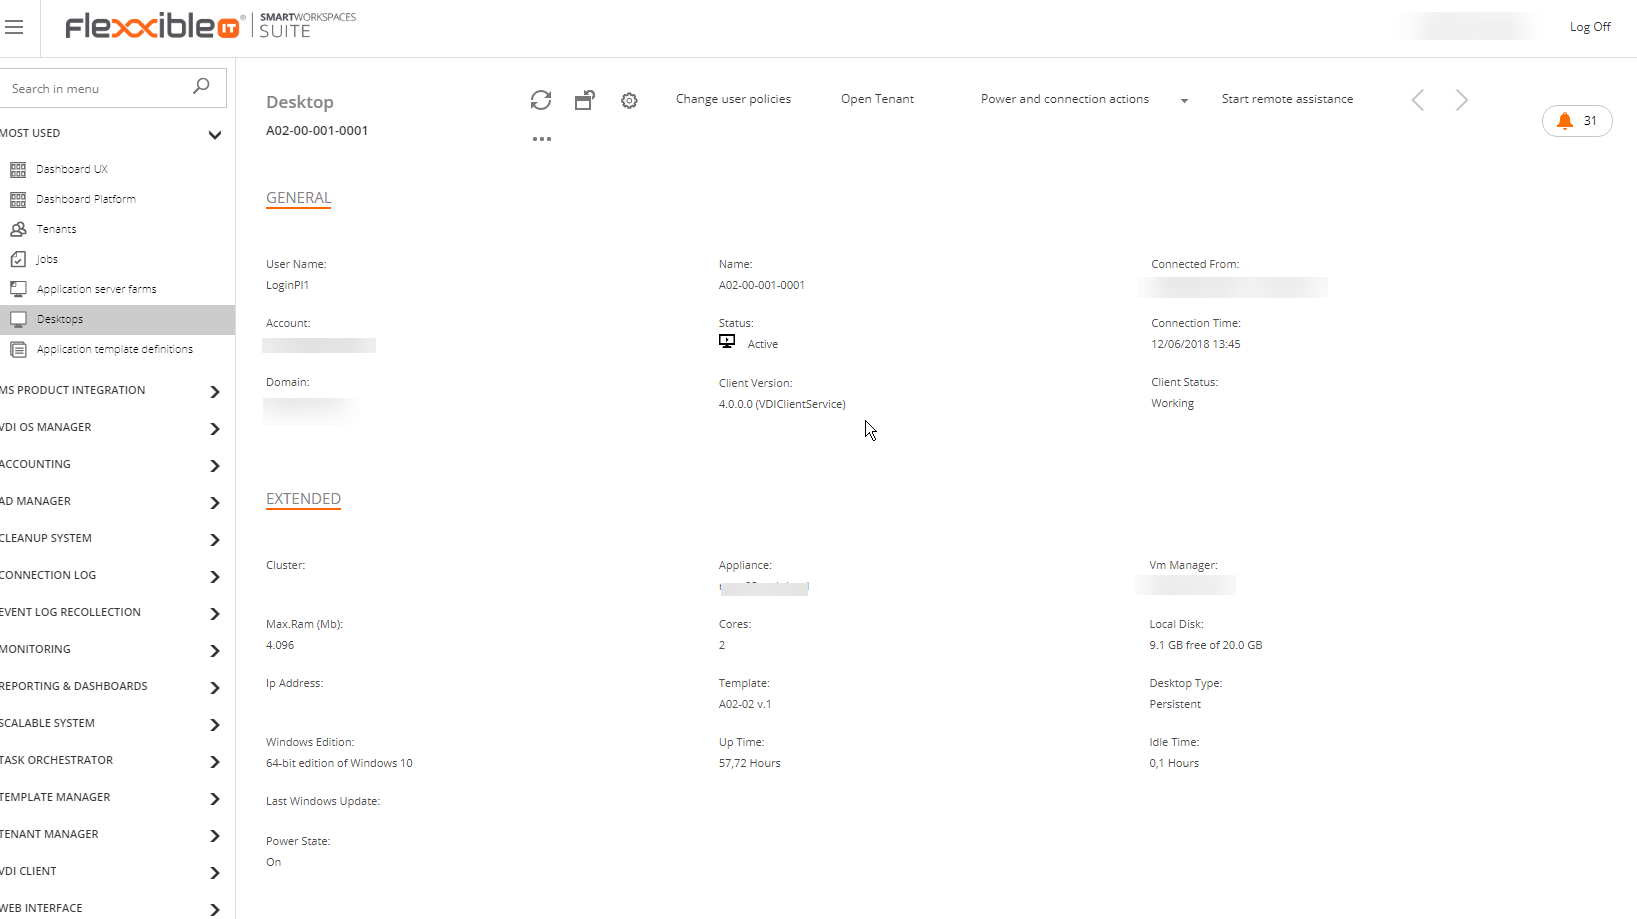
Desktop details:
Desktop Details Performance Charts: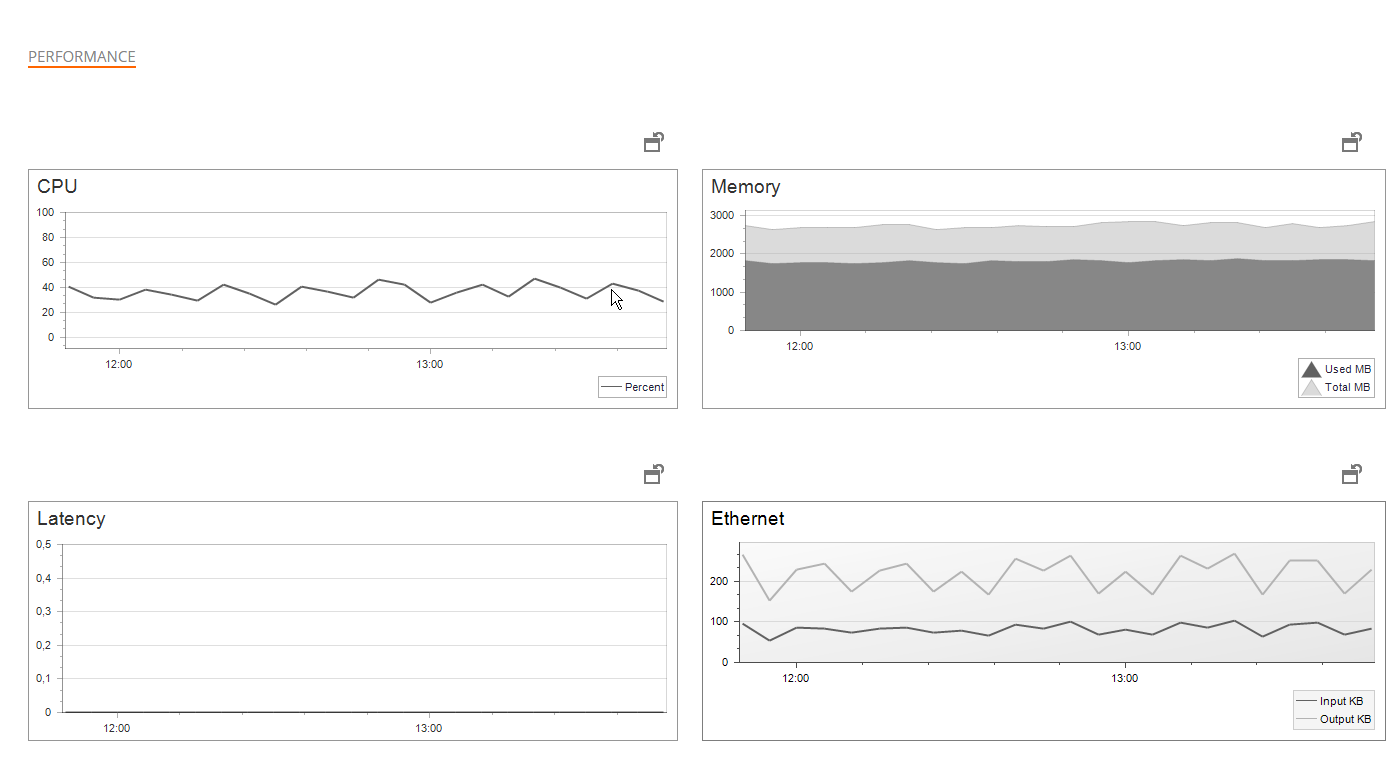
Actions
Here you find the actions you can carry out on the screen.
“Reset View” button: Now the user can modify the screen, changing the order of columns, visible columns, etc.. This button allows you to return to the screen's default format.
"More actions" button: Being an adaptive interface, it is possible that the space reserved for actions does not contain them all, in which case, the hidden actions will be available on the drop-down menu which can be accessed by clicking on the icon.
 Search
a record search appears here. This menu only appears when you are viewing a list and searches among the hidden columns.
VDI OS Manager remembers the last search made during this section in this screen and re-applies it when you return to the screen.
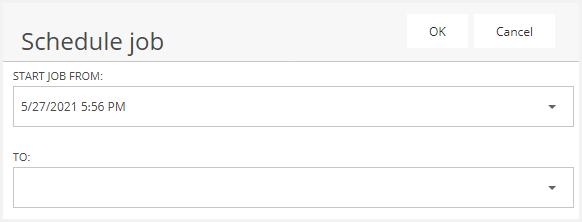
Date format
The date format in Flexxible|SUITE is depending on the browser configuration.
An English (United States) browser language configuration displays the DateTime in the format MM/dd/yyyy HH:mm tt
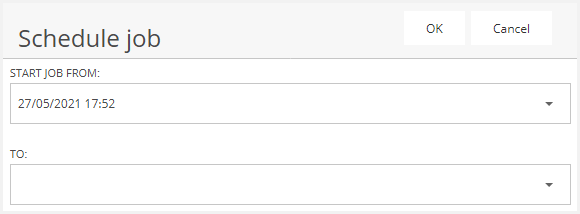
On the other hand, an English (United Kingdom) configuration displays the DateTime in the format dd/MM/yyyy HH:mm
The configuration for various browsers will be described below.
Chrome
To configure the Chrome language, you must follow the next steps:
- Go to Chrome Options (3 vertical pips in the top right-hand corner)
- Choose Settings.
- Choose Show Advanced Options.
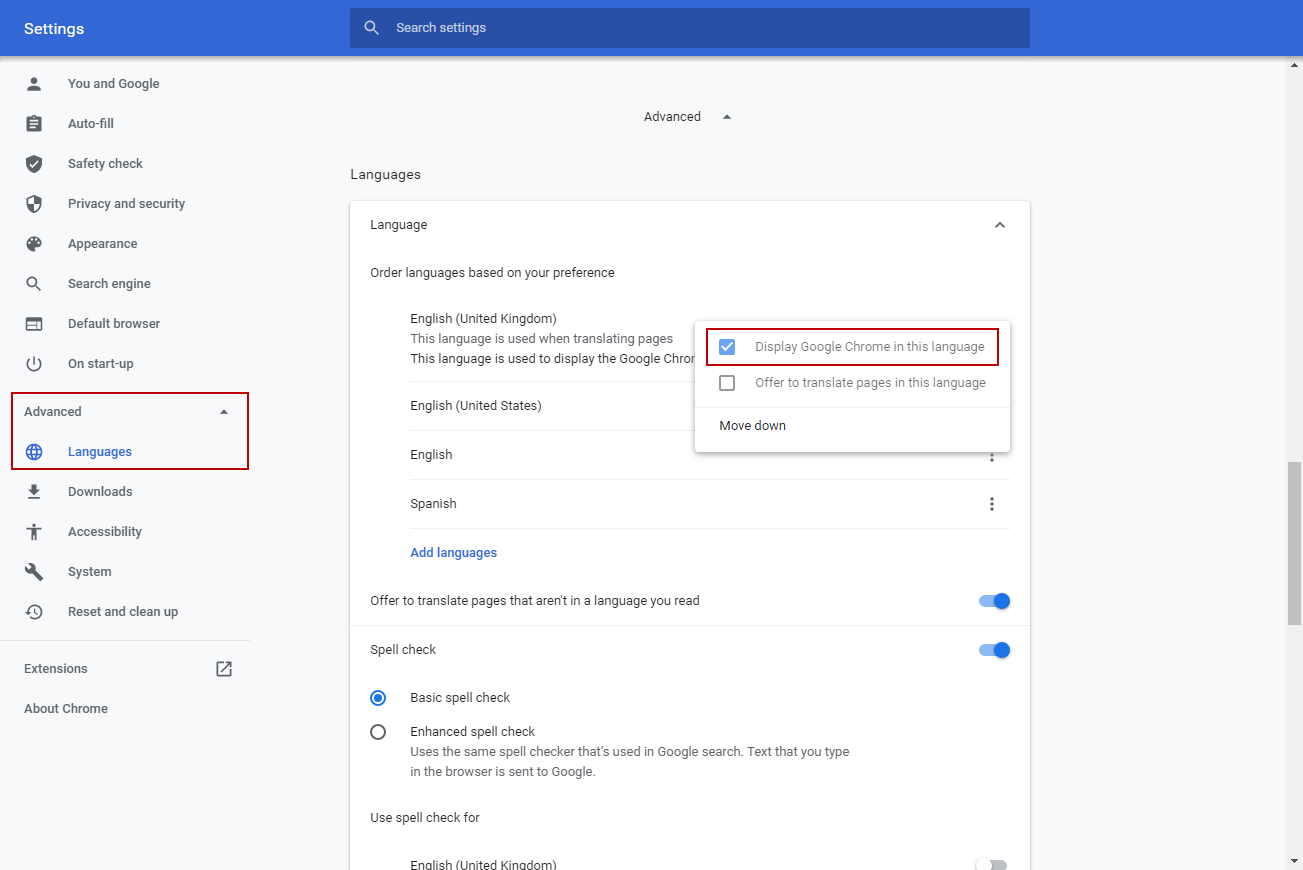
- Under Languages, click Add and find your location-specific language e.g. English (United Kingdom), and add it to the existing list.
- Click on More Actions on the desired language and check the Display Google Chrome option. You must restart the browser to apply changes.
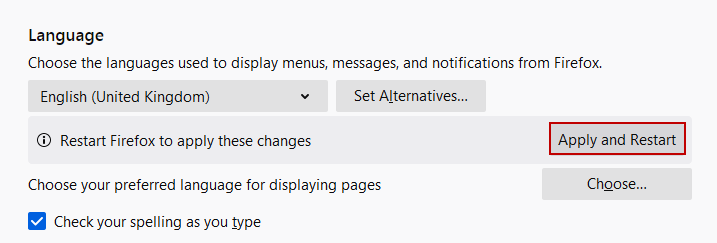
Firefox
To configure the Firefox language, you must follow the next steps:
- Go to Options (3 vertical pips in the top right-hand corner)
- Choose Options.
- Choose General.
- Under Language and Appearance, click Set Alternatives and find your location-specific language e.g. English (United Kingdom), and add it to the existing list.
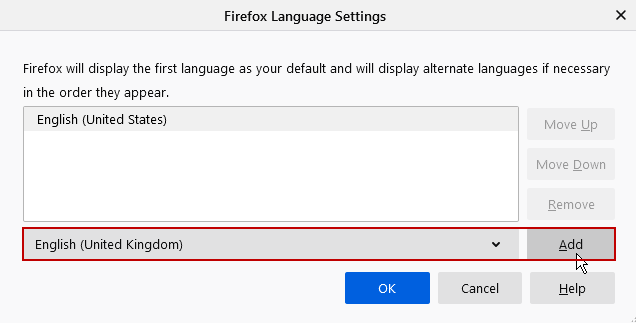
- Click on Ok and Apply and Restart on the desired language.
Edge
To configure the Firefox language, you must follow the next steps:
- Go to Settings and more (3 vertical dots in the top right-hand corner)
- Choose Settings.
- Choose Languages.
- Select the three dots on the desired language al check Display Microsoft Edge in this Language.
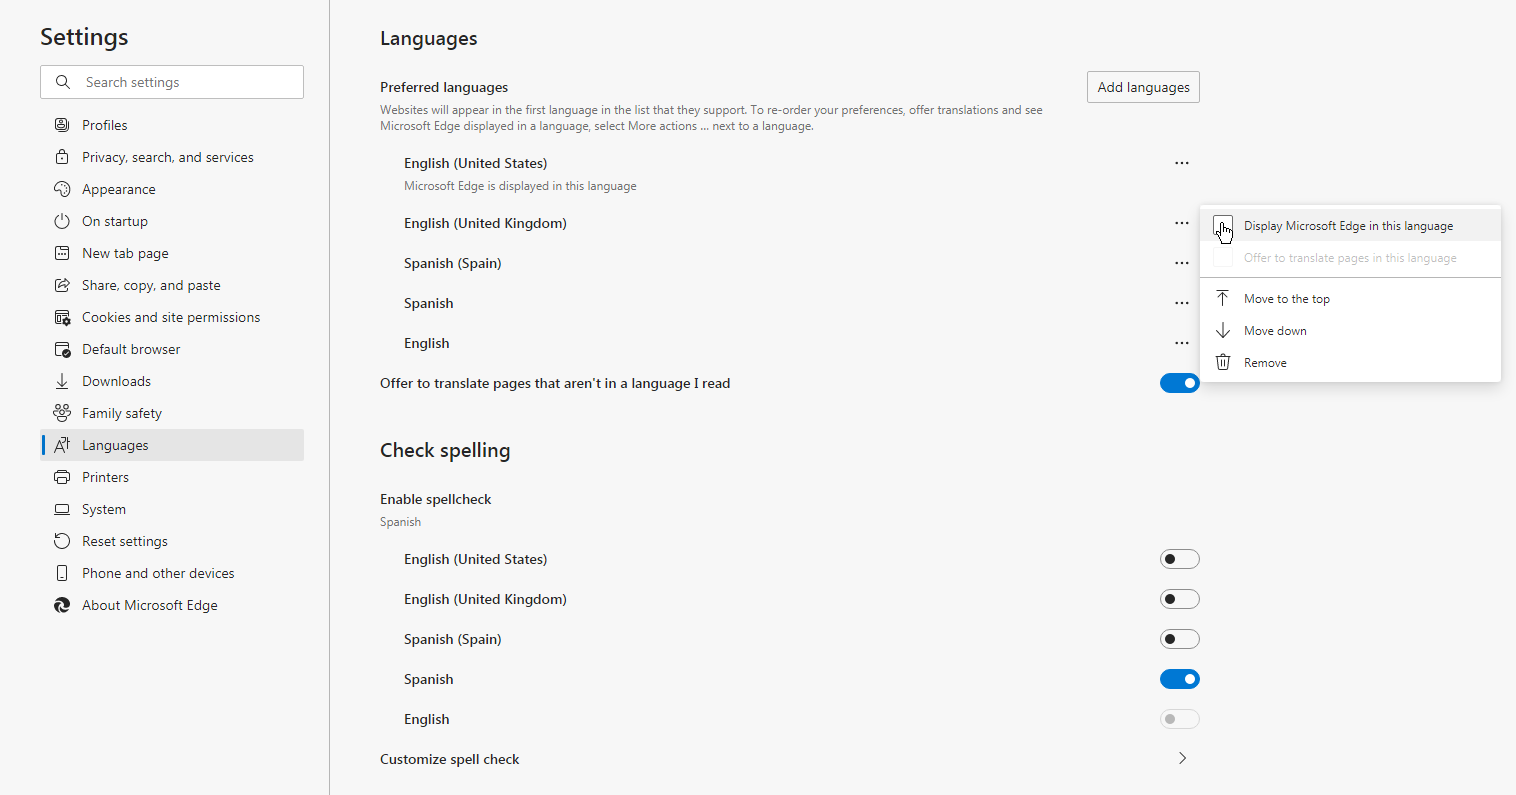
- You must restart the browser to apply changes.