During the initial configuration of a new deployment, after the appliance setup, we need to configure the Thin Clients to connect to this new infrastructure deployed to access the desktops, applications and resources available to the users in the metioned appliance.
By executing a sequence of quick actions, you will be able to achieve the following goals automatically:
- Successful deployment of the HP Device Manager in your server
- Thanks to this susccessful deployment, the Thin Clients, once connected to the network, will be automatically configured to connect to the appliance resources as follows:
- Discovery is configured to point any Thin Client to the HPDM server we have installed
- A standard HP Easy Shell configuration is downloaded from the Flexxible IT repositories to convert the Thin Client into a secure kiosk
- The downloaded standard configuration is modified to match the installed environment
- A rule is configured to update the ThinOS to the latest version
- Discovered Thin Clients are configured to create a direct receiver connection to the SMB StoreFront
You will have the option to deploy a virtual machine where you can launch the HP Device Manager console to perform additional operations on the Thin Clients (note -> This step is optional as you can also install the console on other devices such as VDI, computers, etc).
Deploying HP Device Manager server
To deploy HP Device Manager server after the appliance deployment you will need to go to the control panel. Remember that the default IP is 192.168.50.50 but during the deployment process you may have changed it:

Enter the password to login
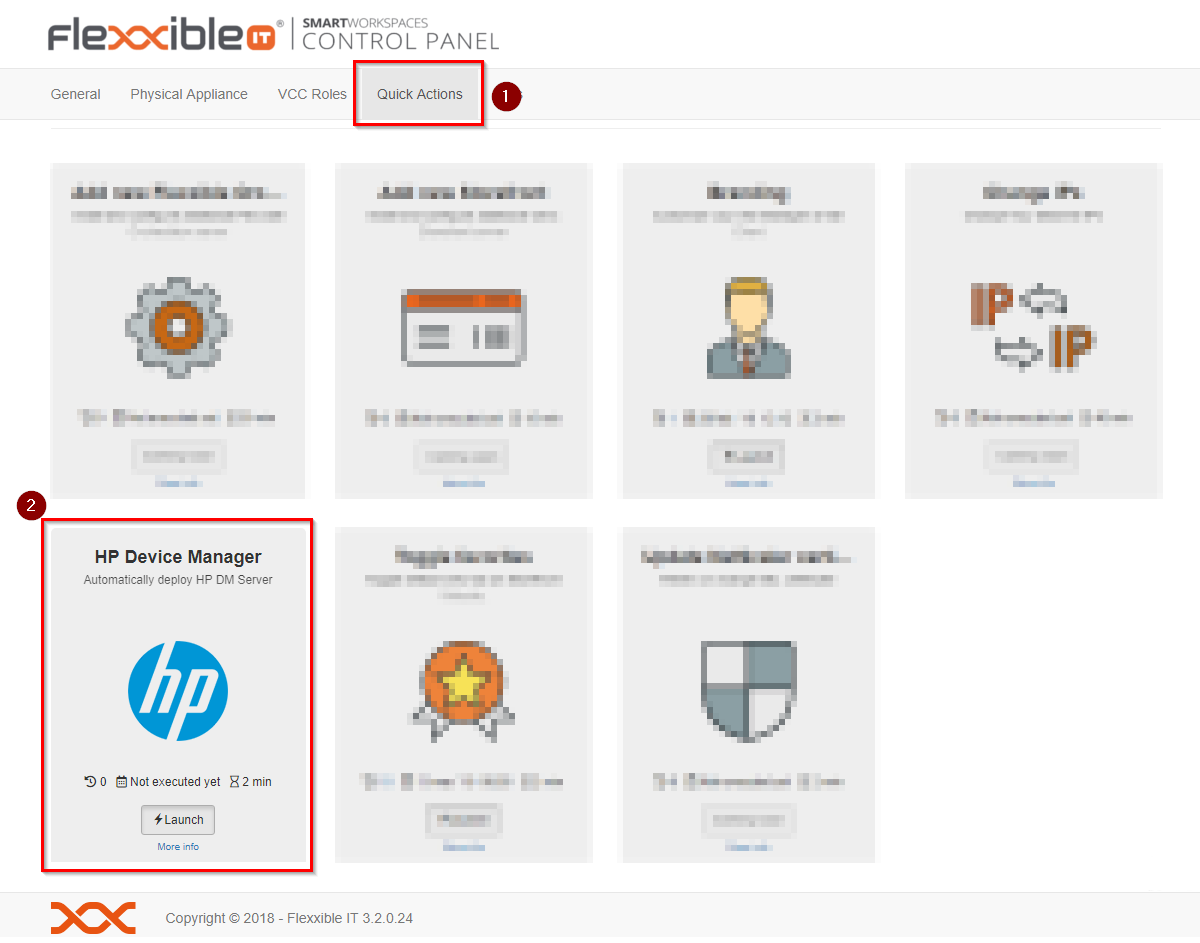
Go to the fourth tab, called "Quick Actions" and select the Quick Action called "HP Device Manager"
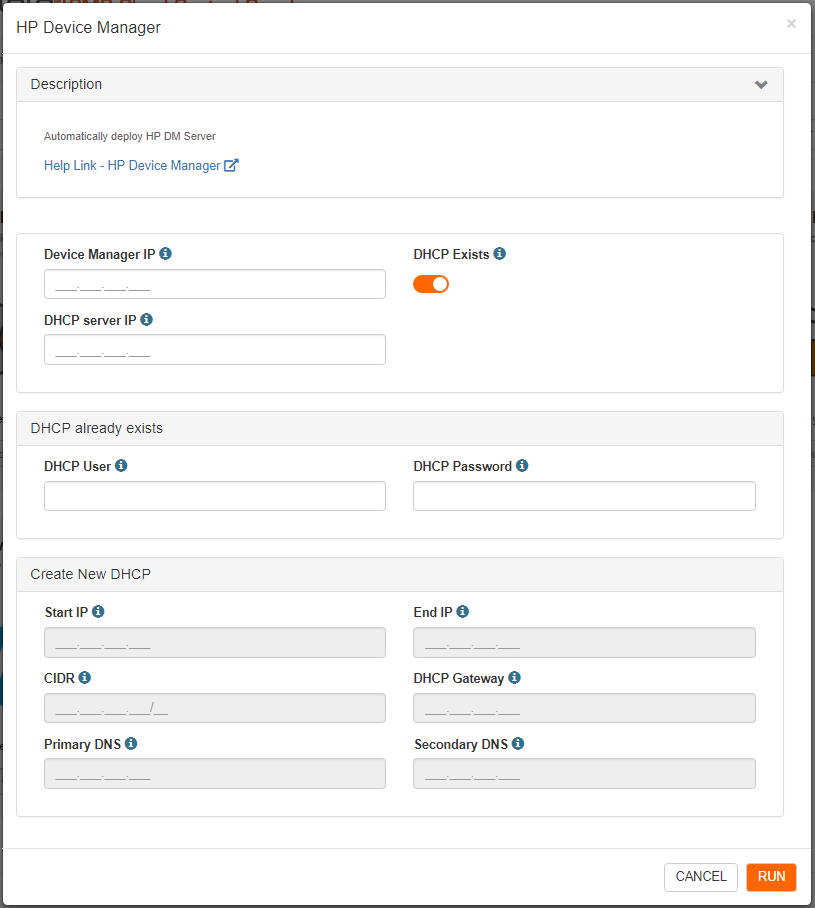
In this session, you will have to specify the IP that will be assigned to this new server and insert the DHCP values. To activate the auto-configuration of the Thin Clients at the moment they connect to the network, it will be necessary to modify the values provided by the DHCP to the Thin Clients during the time the DHCP server assign the IP to the Thin Clients.
If you do not have a Windows DHCP server and have not chosen to create it automatically in the process of deploying the appliance, you must enter the following data:
- Device manager IP. This is the IP for the HP Device Manager server.
- Windows DHCP server IP. This is the IP for the new DHCP server.
- In the "Create new DHCP" Session, enter the following info:
- Start IP. This is the DHCP starting IP
- End IP. This is the DHCP ending IP
- CIDR of the assigned VLAN
- DHCP Gateway
- Primary and secondary DNS servers.
If you have a Windows DHCP server or have chosen to create it automatically in the process of deploying the appliance you must enter the following data:
- Device manager IP, which is the IP for the HP Device Manager server.
- DHCP server IP, which is the IP for the new Windows DHCP server.
- In the "DHCP already exists" session, enter the folloing data:
- DHCP user, which is the user to log in to the DHCP server
- DHCP password, which is the password to log in to the DHCP server
Click on "Run" to start the process
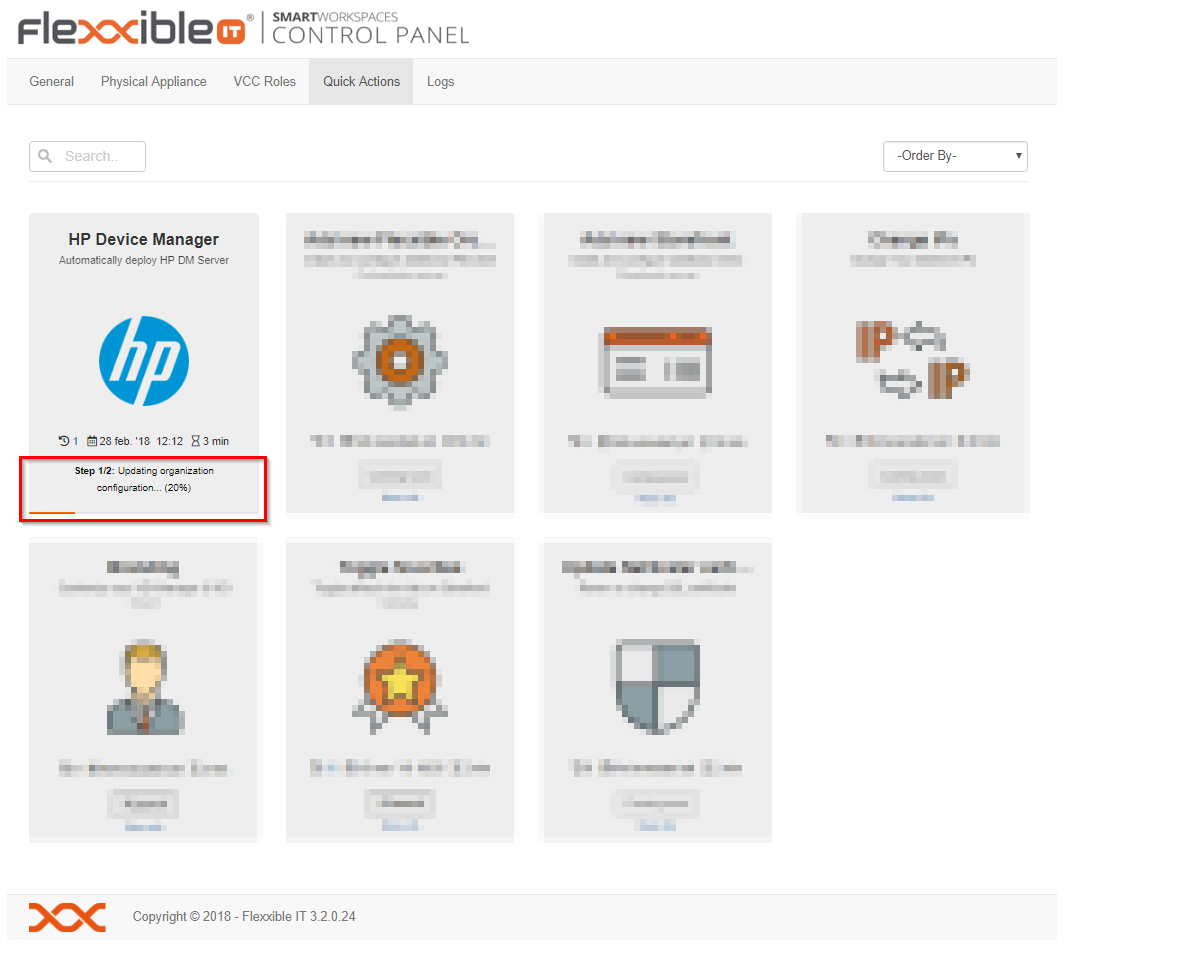
During the process you will see how Quick Action itself will show you all the steps it went through. Also, you will be able to see the progress bar at the bottom.
Wait until the process is finished.

From this moment forward, every time you connect a Thin Client to the network, it will be automatically configured to connect to the appliance and work with its resources.
It is possible, that in addition to the automatic configuration, you want to use the HP Device Manager console to perform additional actions such as monitoring the Thin Clients, practice firmware updates, etc.,
If that is the case, you have several options:
Download and install HP Device Manager Console on your current computer
Go to the HP Device Manager Console download page, download the application and install it on your computer.
Remember the IP you have assigned to the HP Device Manager Server you have deployed before as you will need it to connect the client console.
Create a virtual server using the installed console
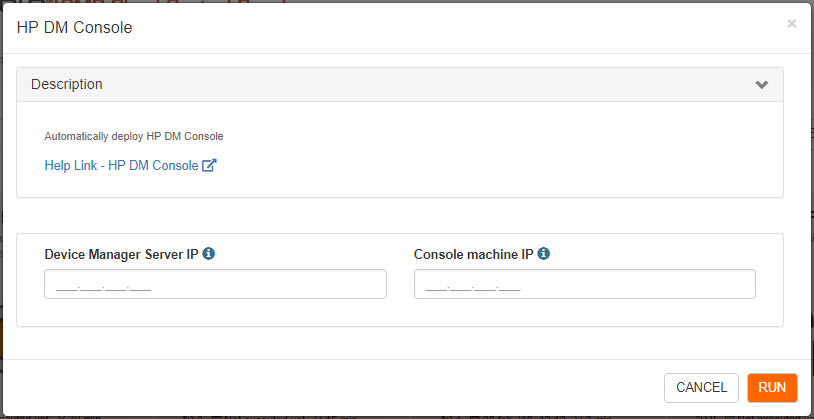
Go to control panel-> Quick Actions and select the quick action called "HP DM Console"
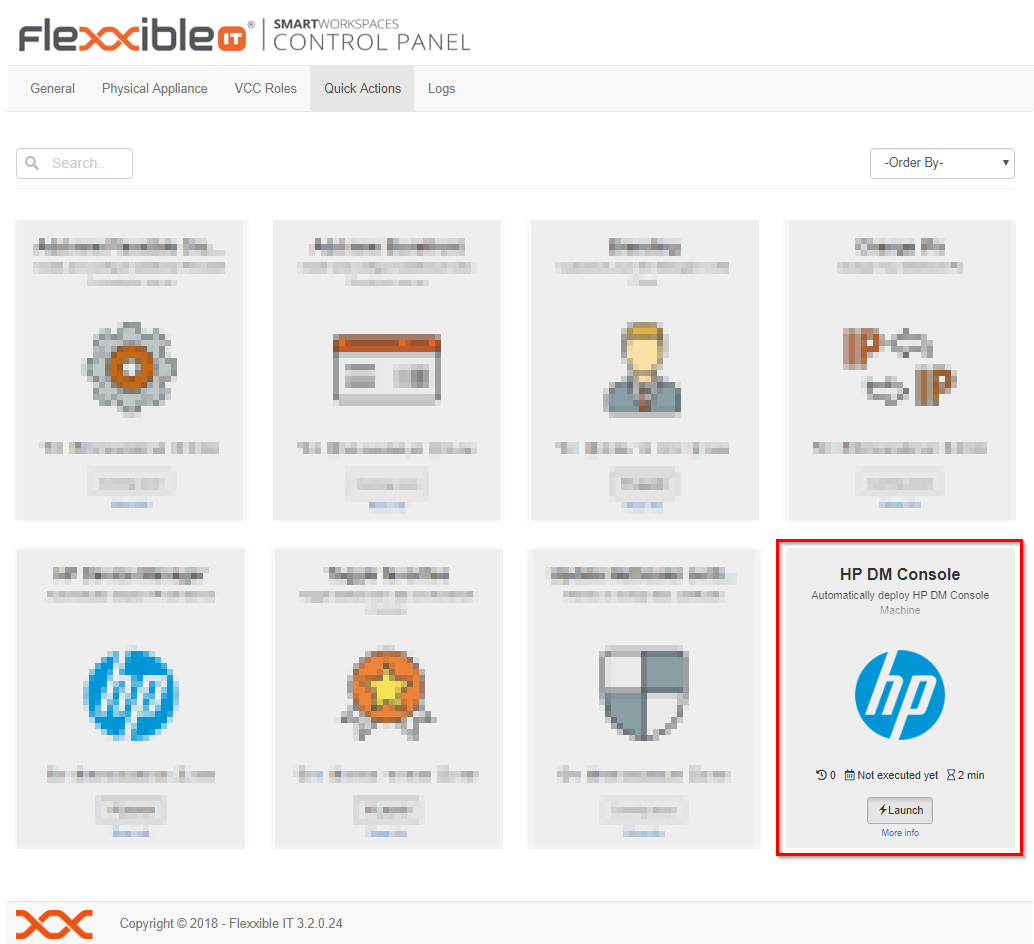
To deploy this server you will be asked for the following information:
- Device manager server IP, which is the HP Device Manager Server IP that we deployed in the previous step
- Console machine IP, which is the IP of the virtual machine that we are going to deploy now where we will have the client console
When the process is finished, you will have a virtual machine available with the console installed to manage the Thin Clients. Remember that this machine does not have a Citrix VDA, so to access it, you must do it by using remote desktop.
In the next version, this process will not be necessary as HP Thin Cliens Management will be included in the Flexible|VDI OS Manager web console.
Enjoy managing a complex environment the easy way with HP and Flexxible IT!!!