The purpose of this document is to explain how to distribute the A2DAgent with or without proxy authentication through the use of an Active Directory group policy (GPO).
Installation types
The installation of the agent depends exclusively on the internet connection that has the Endpoint where it is to be installed, then the different types of configuration supported are listed:
- A2DAgent (without Proxy)
- A2DAgent (with Proxy)
- A2DAgent (with Proxy Authentication)
Note: If the Internet connection with authenticated proxy is used, this User Proxy will be used for all A2DAgent communications.
Requisites
- Access https://www.apps2digital.com (to download the A2DAgent)
- CustomerID (Mandatory)
- Proxy IP (Optional)
- Proxy Port (Optional)
- New User Proxy (Optional)
- New Password Proxy (Optional)
- Shared folder with reading permissions
- The internet connection must allow output to the following URL’s:
Download and copy A2DAgent
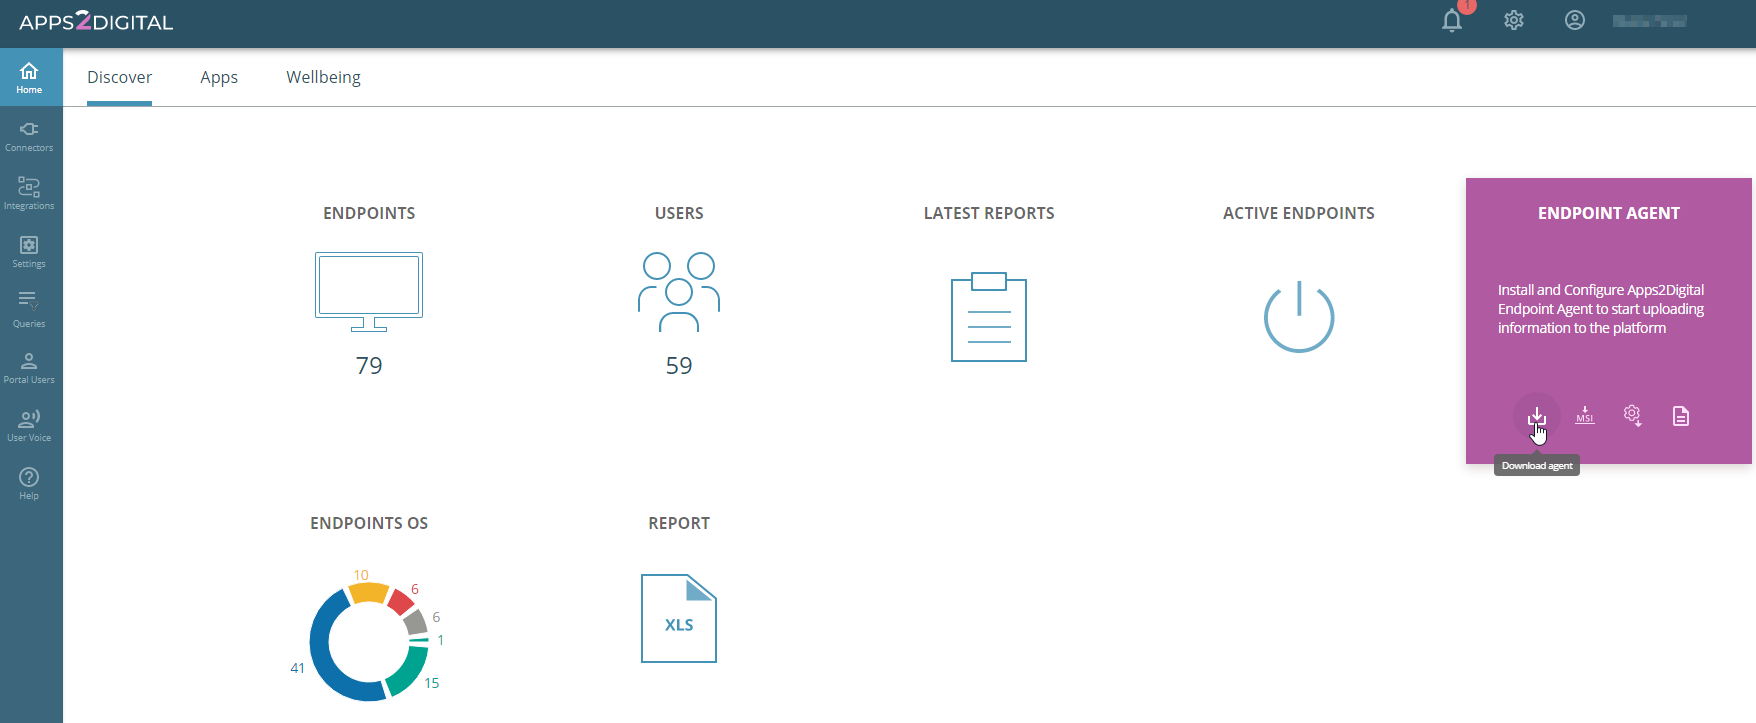
Login at https://admin.apps2digital.com/
In the “Choose the customer” portal, select “Customer Name” and press click.
- In the “Endpoint Agent” box, select “Download” and press click.
- The file will automatically download in the folder chosen by the user.
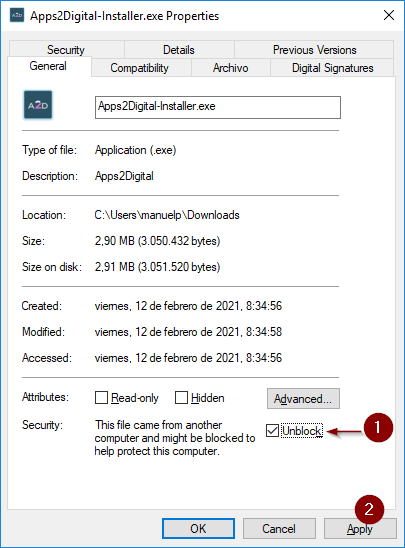
Once the file has been downloaded from the Internet, it is locked. Go to the file properties and select the checkbox “Unblock” to unlock it.
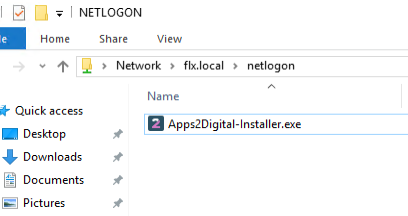
Copy the downloaded exe file to the shared folder with reading permissions. In this example, shared folder is \\flx.local\netlogon.
Create GPO Distribute A2D Agent
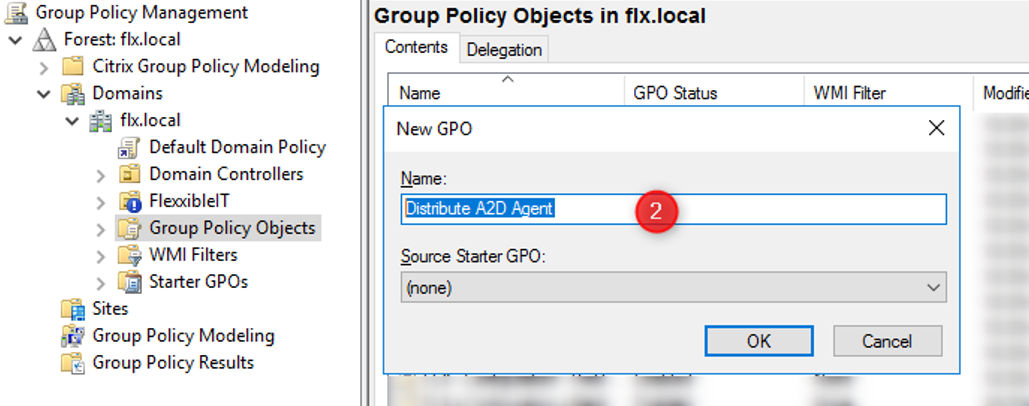
Create GPO in Domain Controller with the name “Distribute A2D Agent”
- Open group policy Management
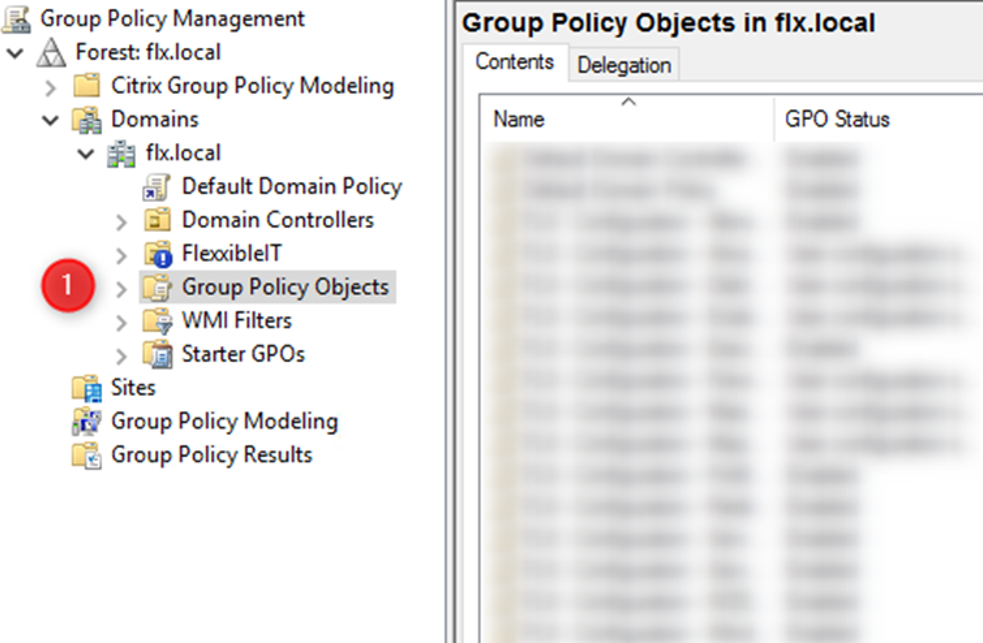
- Go to Group Policy Object. Click “New” and set the name
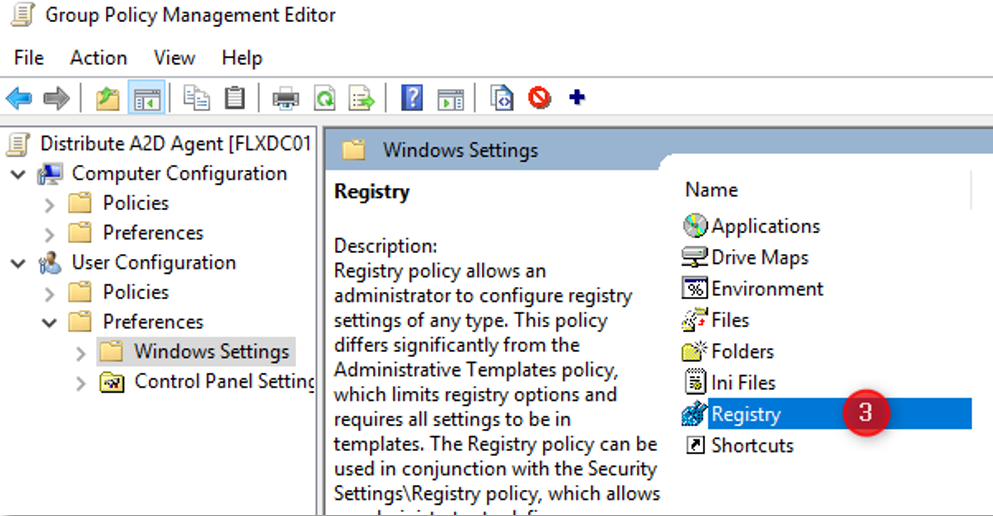
Create Registry Keys (GPO)
Edit the “Distribute A2D Agent” policy and go to User Configuration\Preferences\Windows Settings\Registry
New Registry Item
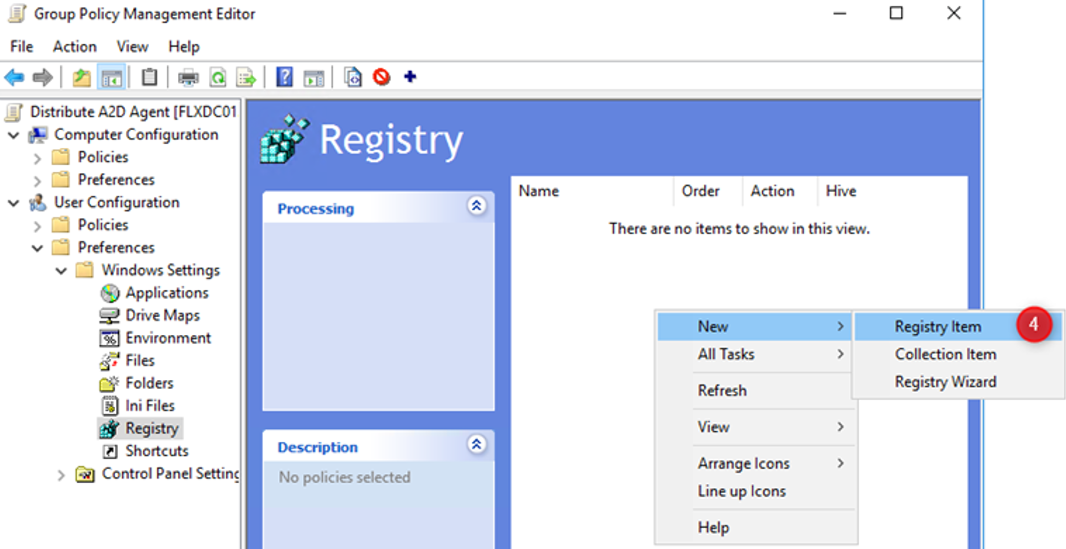
Depending on the type of internet connection of the endpoint, the necessary registration keys will be created:
A2DAgent without Proxy: Create CustomerSID
A2DAgent with Proxy: Create CustomerSID, ProxyUri
A2DAgent with Proxy Authentication: Create CustomerSID, ProxyUri, ProxyUser, and ProxyPassword

Check the following article if you have doubts about registry entries.
-Example for creating the Registry Key

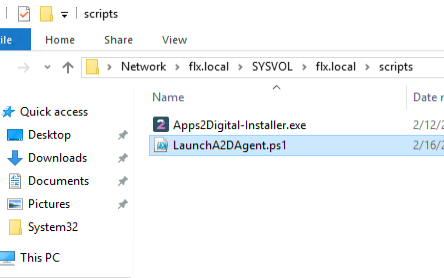
Create script to launch A2DAgent
Create a script with the name LaunchA2DAgent.ps1 with the following content:
$exefile = Join-Path $env:TEMP "Apps2Digital-Installer.exe"

# Wait for session startup
Start-sleep -Seconds 30
Start-Process $exefile
Copy the Script in \\flx.local\SYSVOL\flx.local\scripts\LaunchA2DAgent.ps1 (“flx.local” is the example above)
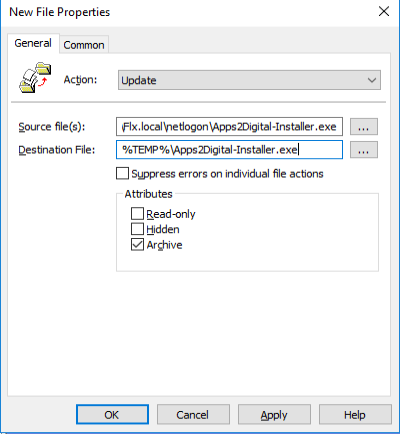
Copy Setup in Temporary User folder (GPO)
Edit the “Distribute A2D Agent” policy and go to User Configuration\Preferences\Windows Settings\Files\Logon, and create a newly copied file.

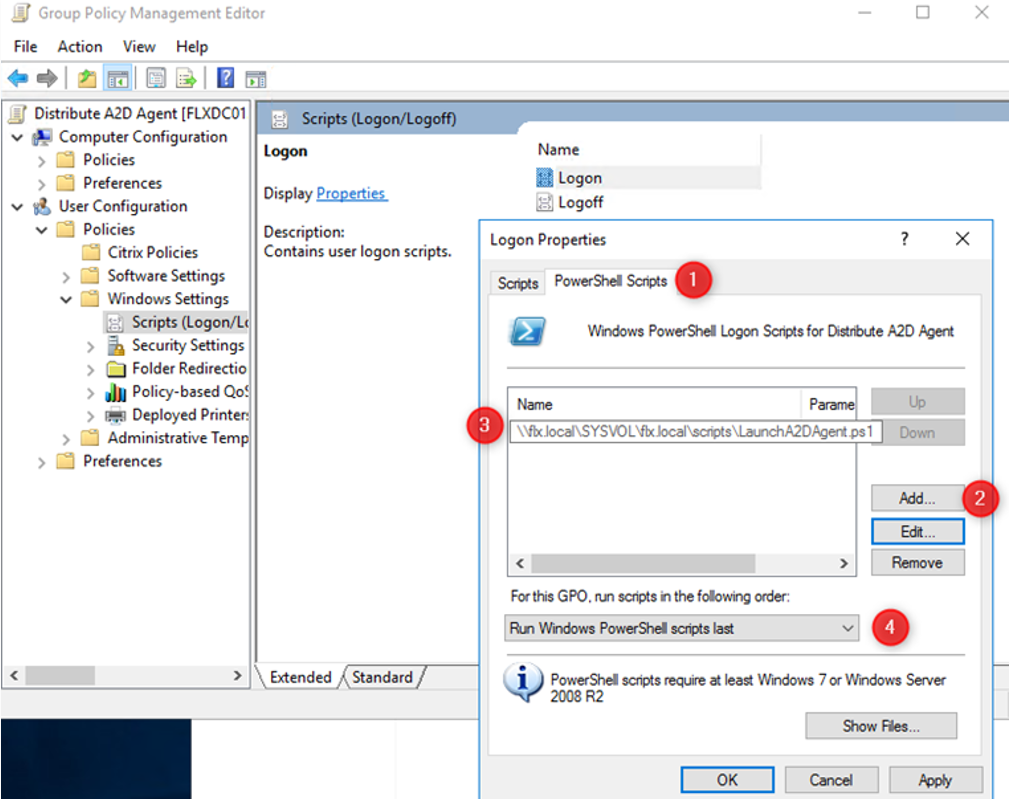
Assign script to LaunchA2DAgent in Logon (GPO)
Edit the “Distribute A2D Agent” policy and go to User Configuration\Policies\Windows Settings\Scripts (Logon/Logoff)\Logon, and create new Powershell Scripts
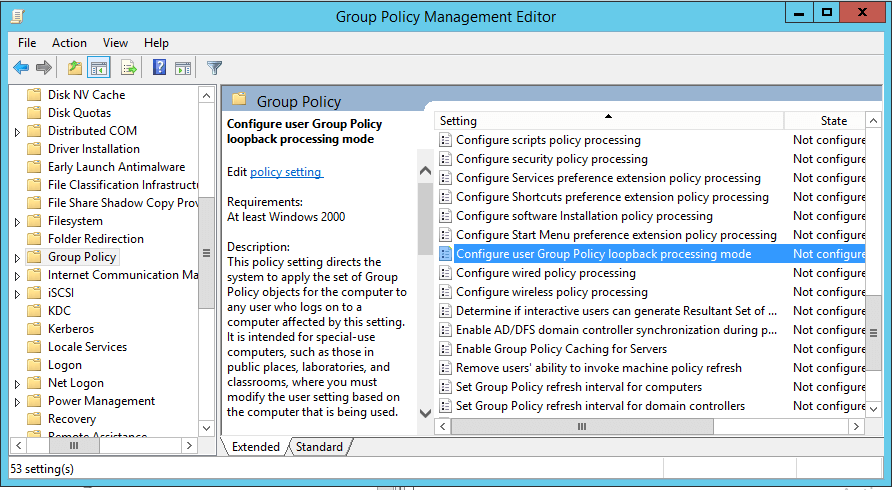
If GPO is linked in Organization Unit (OU) with only Computer objects, remember to configure loopback processing setting.
The setting is located on Computer Configuration > Policies > Administrative Templates > System > Group Policy > Configure user Group Policy loopback processing mode.
The GPO will be applied when you log in again.