There are two ways to install the Apps2Digital Endpoint Agent:
- Manual installation
- Don't need administrator rights
- A2D agent keeps settings on HKCU (Current User registry)
- Auto-update service update A2Dagent when detecting a new version
- Automatic installation: for Terminal Server, Citrix XenApp or multiuser servers.
- Administrator rights are required to install
- A2D agent keeps settings on HKLM (Local Machine registry)
- By design, auto-update is disabled because users do not have rights
Manual installation
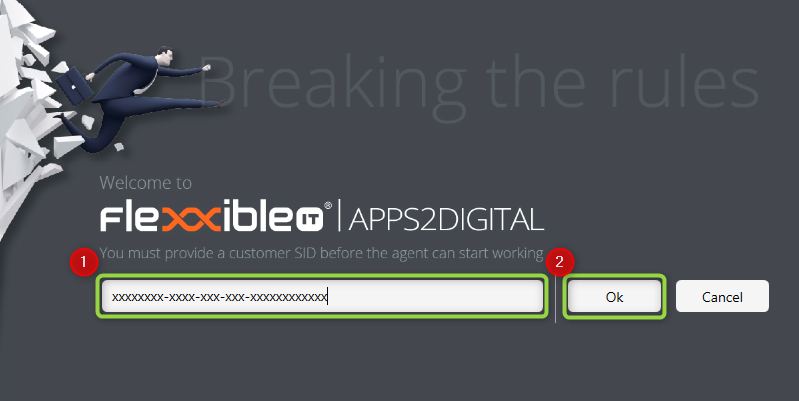
1. Contact your Flexxible IT account manager to obtain your Customer SID
Your Customer SID will be in this format "xxxxxxxx-xxxx-xxxx-xxxx-xxxxxxxxxxxx".
NOTE: If you do not obtain your customer SID the A2DAgent will not launch properly.
2. Download the A2D Agent from your A2D console

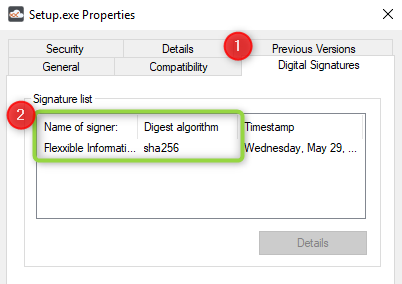
3. Validate the A2DAgent is digitally signed.
Right click the Setup.exe and click Properties, then click the Digital Signatures tab.
Validate that Flexxible Information Technology, S.L. is the signer.
4. Run Setup.exe and enter your customer ID
Automatic installation
1. Contact your Flexxible IT account manager to obtain your Customer SID
Your Customer SID will be in this format "xxxxxxxx-xxxx-xxxx-xxxx-xxxxxxxxxxxx".
NOTE: If you do not obtain your customer SID the A2DAgent will not collect data properly.
2. Download the Machine-Wide A2DAgent msi file from your A2D console
3. Validate the A2DAgent is digitally signed.
Right click the Setup.exe and click Properties, then click the Digital Signatures tab.
Validate that Flexxible Information Technology, S.L. is the signer.
4. Run msi file using your Customer ID
- Use msiexec to install it:
msiexec /i "Machine-Wide A2DAgent.msi" /qb CUSTOMERSID=ca98117a-1378-4446-8c26-8b4d448494cb
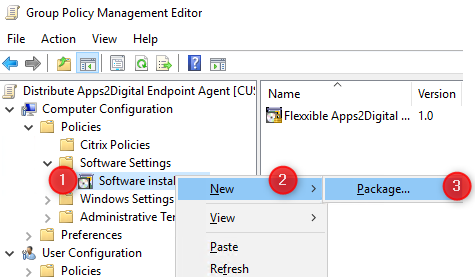
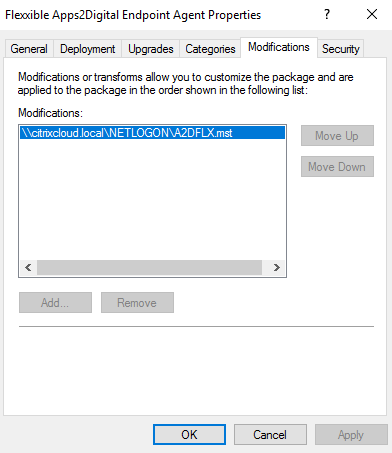
- Or use Group Policy (GPO) to deploy it using 'Software installation'
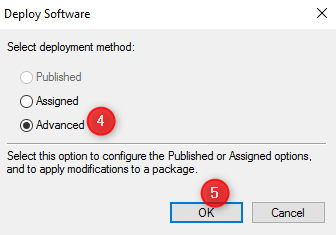
Check 'Make this 32-bit X86 application available to Win64 machines' is activated in Advanced button in Deployment tab
To create mst file you can use third-party software like ORCA or similar.
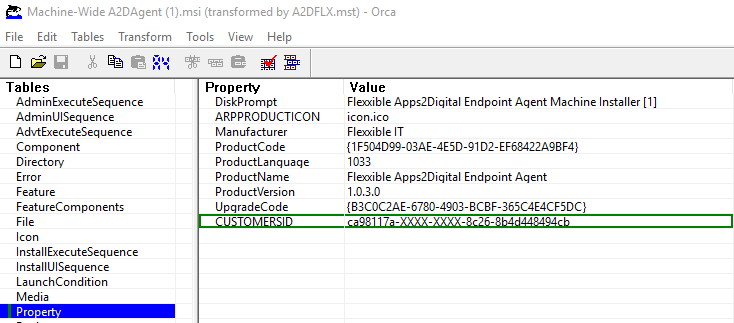
Add mst file (MSI Transforms file) with Customer ID configurated.
If you have doubts about the process you can find more info here.
Save changes and link GPO to correct OU.
Expected Results
- The A2D agent will not be visible in the task bar only in task manager
- The A2DAgent will upload the first payload after it has been running for 30 seconds
- After the first payload the A2DAgent will upload information every 5 min
