Introduction
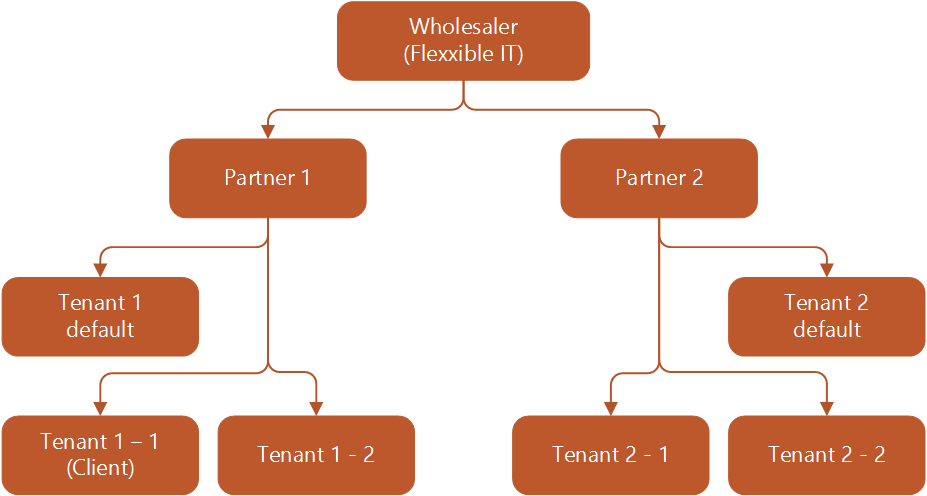
Flexxible|SUITE provides a full multitenant capability, allowing organizations to manage multiple isolated environments via a single management console, removing complexity and reducing cost.
This feature will allow to isolate elements as templates, resources (VDI/SDI/AppServers), users and also delegate management or support tasks to specific groups of users.
Tenants view
The "Tenants" view allows having a quick overview of the Wholesalers-Partners-Tenants structure. You can access this section through the Tenant Manager menu group option.
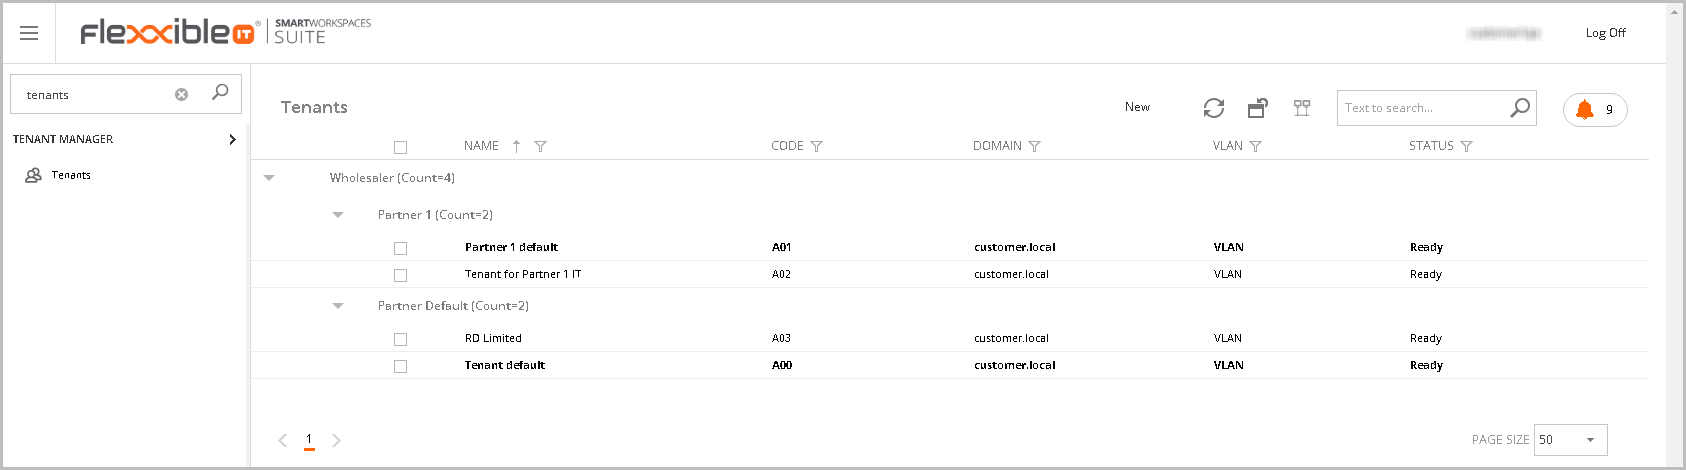
The tree will show the following information:
- Name The Wholesaler, Partner, or Tenant name.
- Code: The unique and automated Tenant code.
- Domain: The Tenant Active Directory domain.
- VLAN: The VLAN associated with the tenant.
- Status: The tenant status, and its values can be Ready, Processing, New, or Provisioning
The tree will show at the first node the wholesaler, then the partners and their corresponding tenants.
You can create a new tenant from this view.
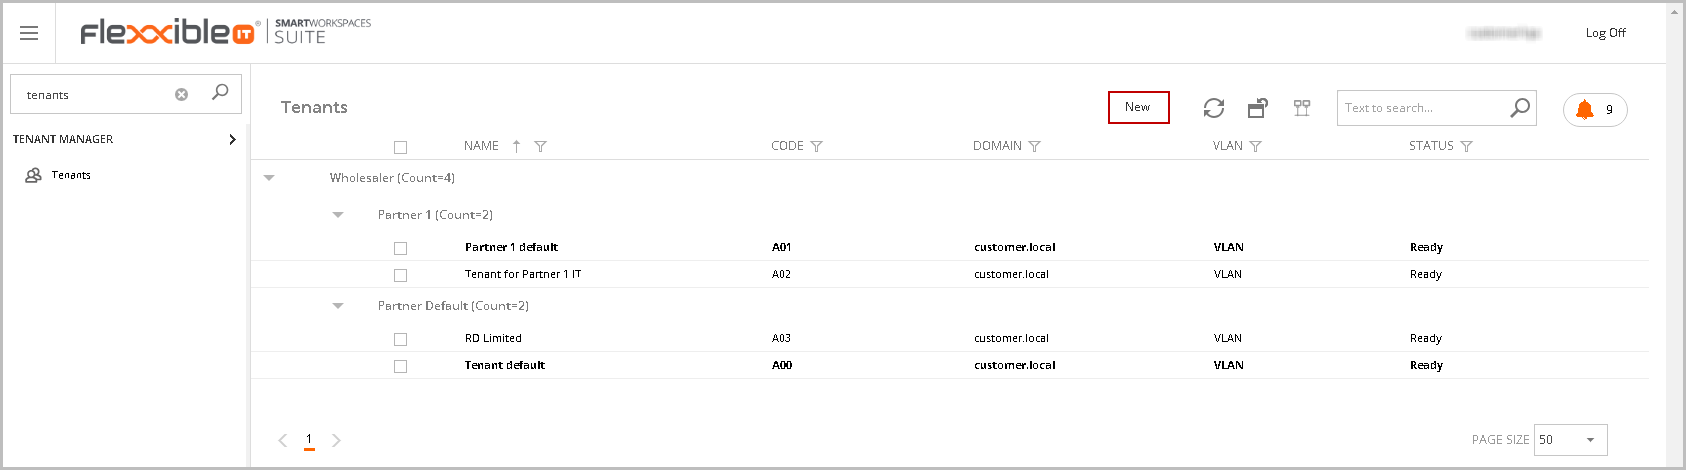
Please visit the How to create a new tenant in a Multitenant Environment article for more information.
Tenant Detail
The tenant detail groups all the tenant information and allows to perform all the actions related to it.
We can divide this view into two sections: the general view and the tabs area.
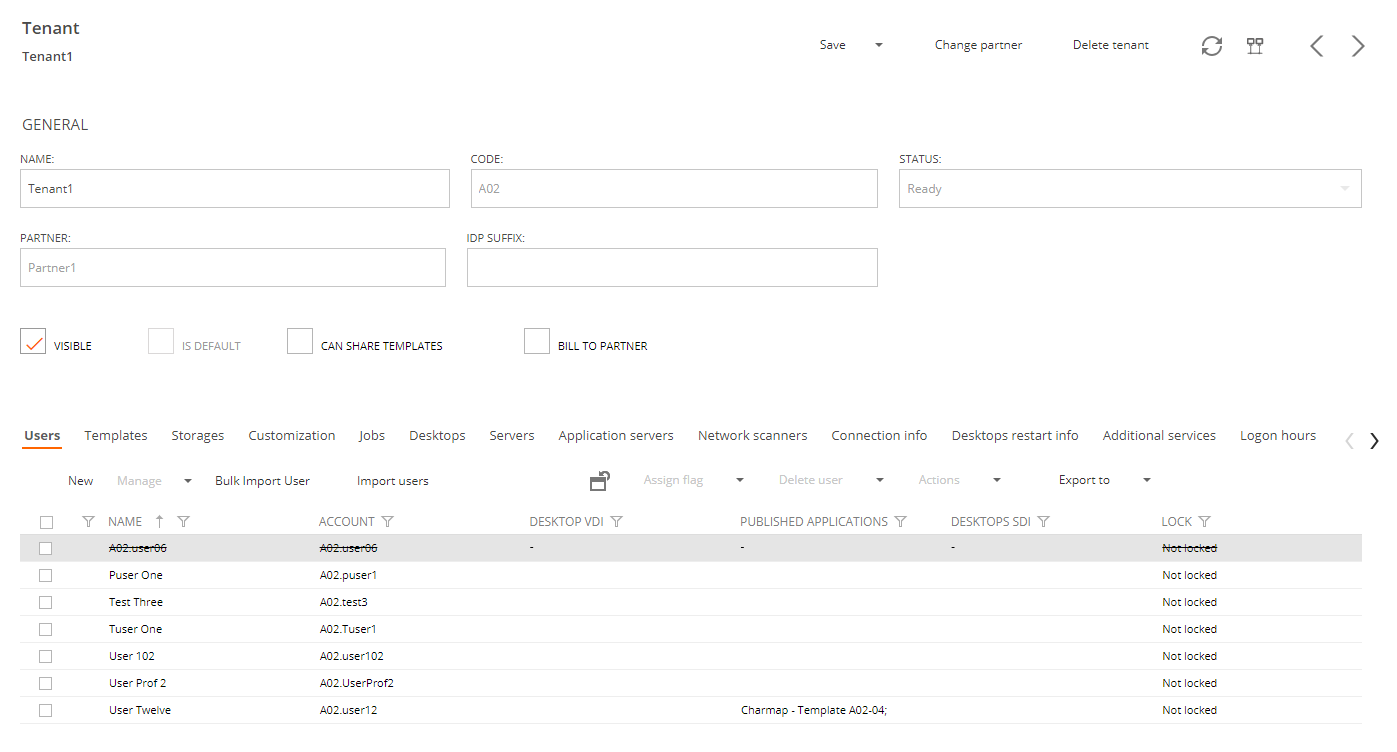
General view
The general view shows general information about the tenant and allows perform some actions as will be described.
Name The Tenant name.
Status: values can be Ready, Processing, New or Provisioning.
Code: Tenant Code.
Partner: Partner name.
You can check the next characteristics which will be described below:
- Can share templates
- Bill to partner
- Visible
- Is default
- IDP suffix
Can share templates
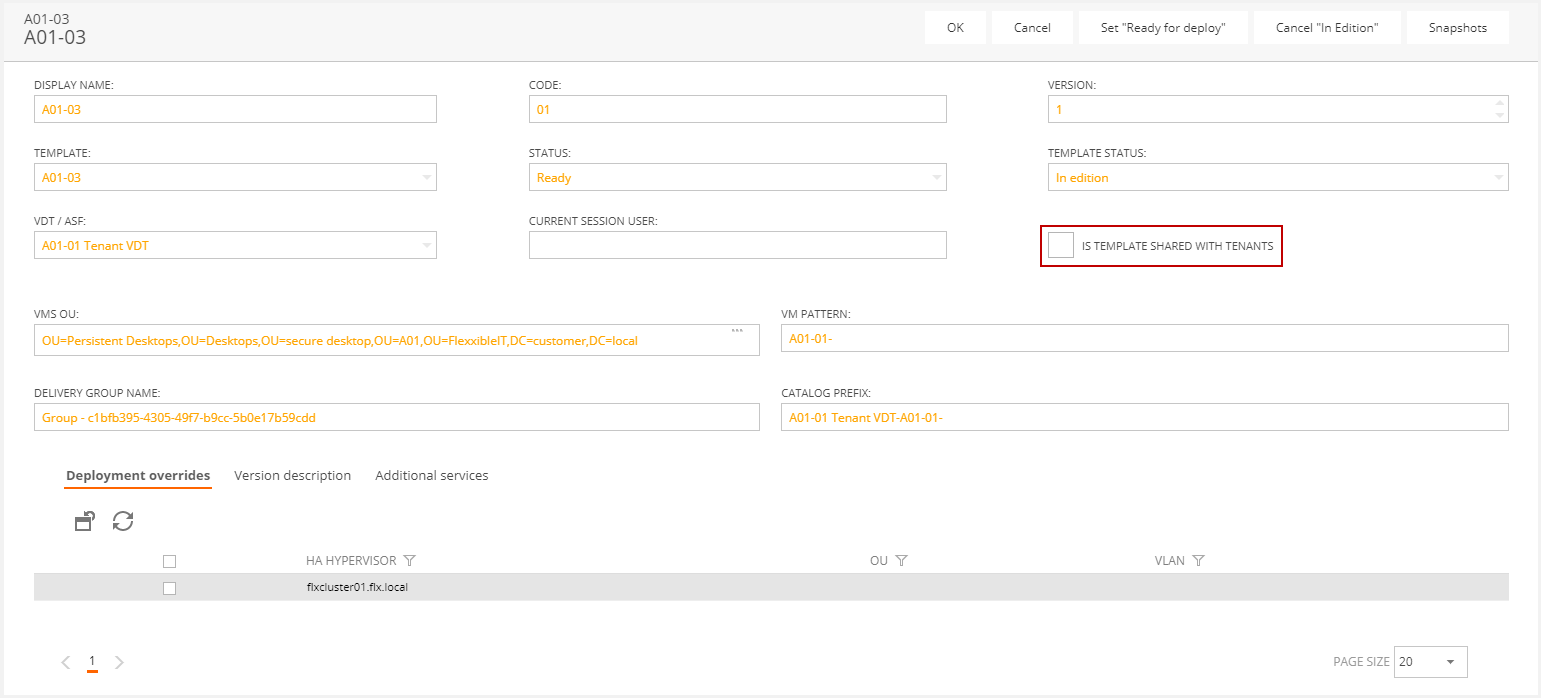
This option allows a Partner (’s default tenant) to share his templates with his tenants. This way a template can be re-used by more than just one tenant. It's only available for desktop templates.
In order to activate it, the "Can share templates" option should be checked off in the Partner's tenant default detail screen. That way will enable the option "Is template shared with tenants" in each template detail screen of that tenant. Then check it off on the selected template to be shared.
Then, another tenant from that Partner could benefit from that template being shared, just by importing it from his detail screen. To do so, just click in the "New template" dropdown menu and then in the "Import shared template" menu option.
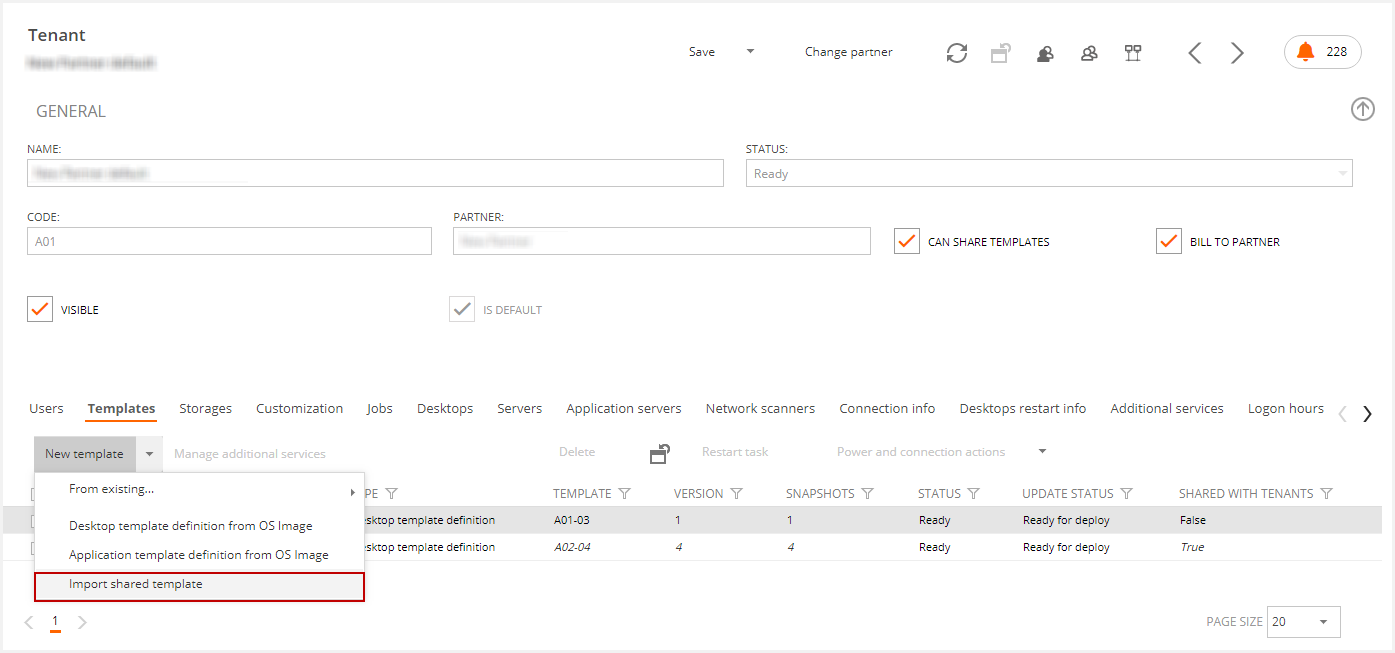
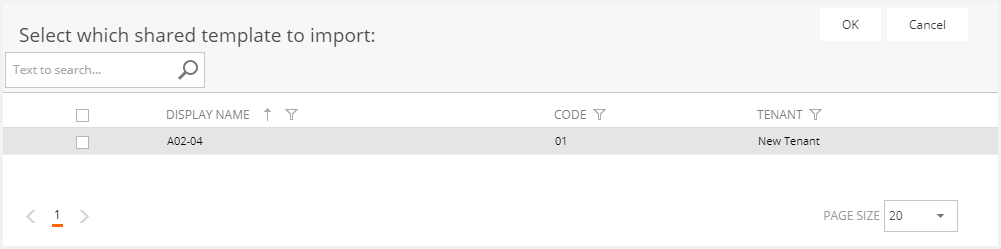
Finally, the available templates will be displayed in a search screen result list. Just select the one to be shared and confirm it.
Bill to partner
In case of automatic billing using VDI OS manager data, if this option is checked, during the Billing process, the Bill will be generated for the Partner. Otherwise, the bill will be included in the tenants' bill.
Visible
This option means that this tenant is visible for the non-admin users if is checked.
The purpose is that an administrator could hide a tenant to their partner during the tenant configuration. This makes the tenant and their VMs are not visible to the partner while the tenant is not checked as visible.
Is default
This check is informative and indicates that this tenant is the one that represents the partner. The users of this tenant will have visibility on the rest of the tenants of the partner.
IDP suffix
This field allows you to enter an IDP suffix. When the suffix is entered, it is validated that the UPN suffix exists at the domain level (it must be previously created from the Active Directory Domains and Trusts console).
All accounts that are added after changing this setting will have the IDP suffix configured, leaving the user accounts already created previously unchanged.
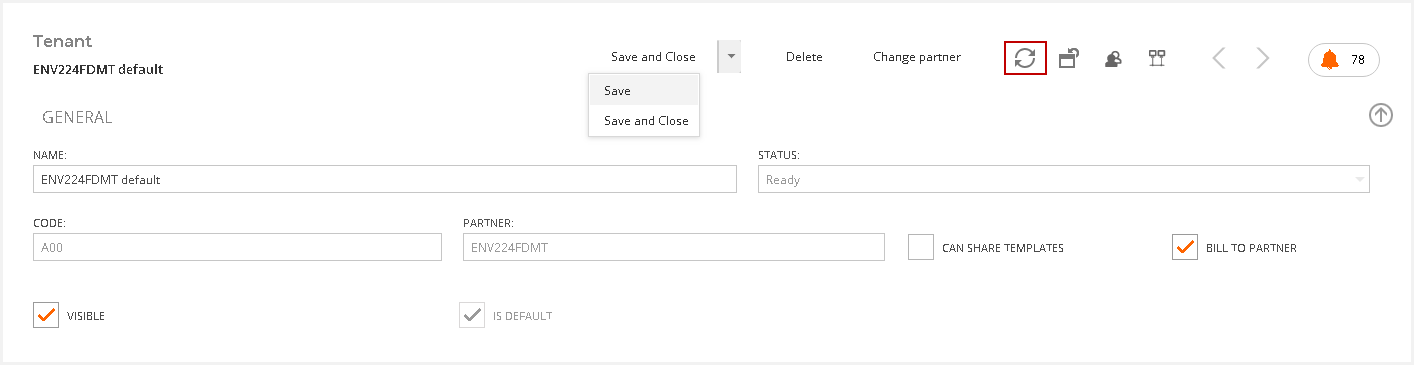
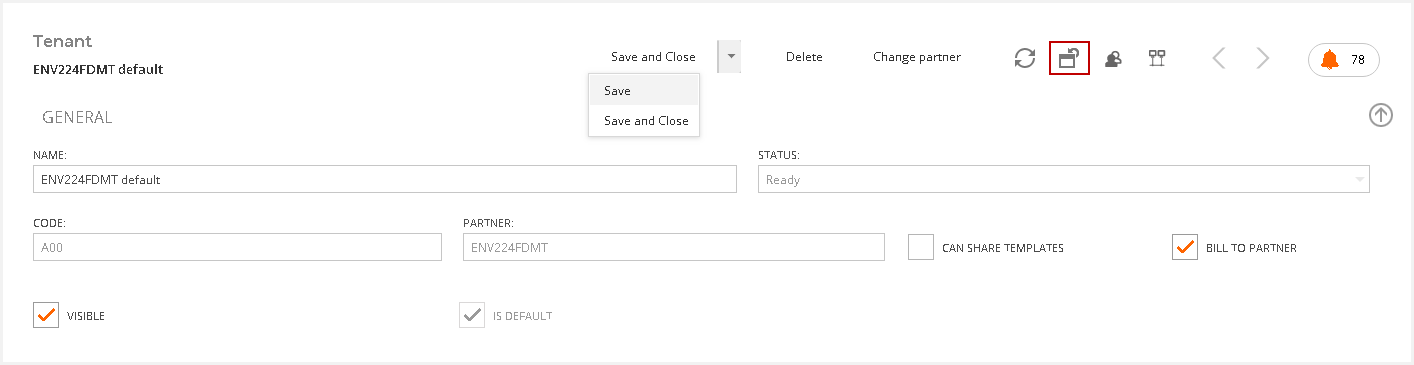
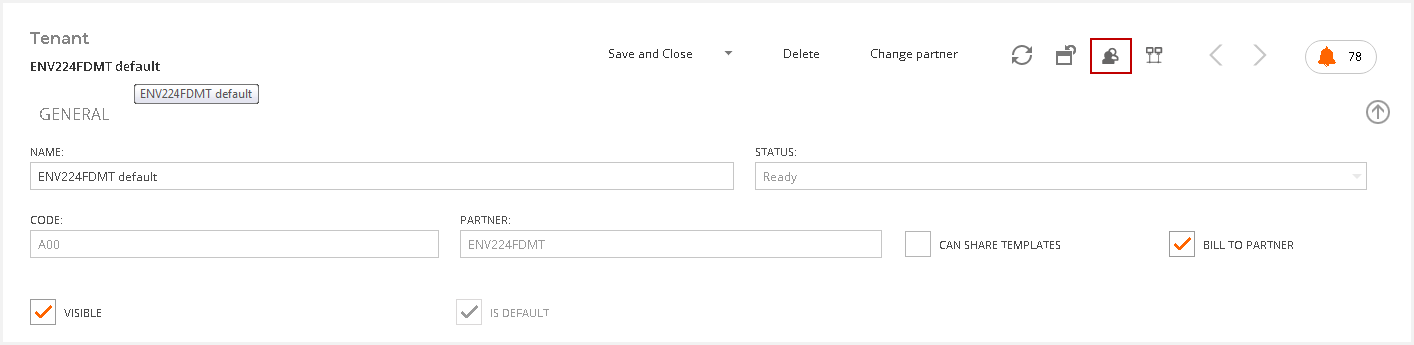
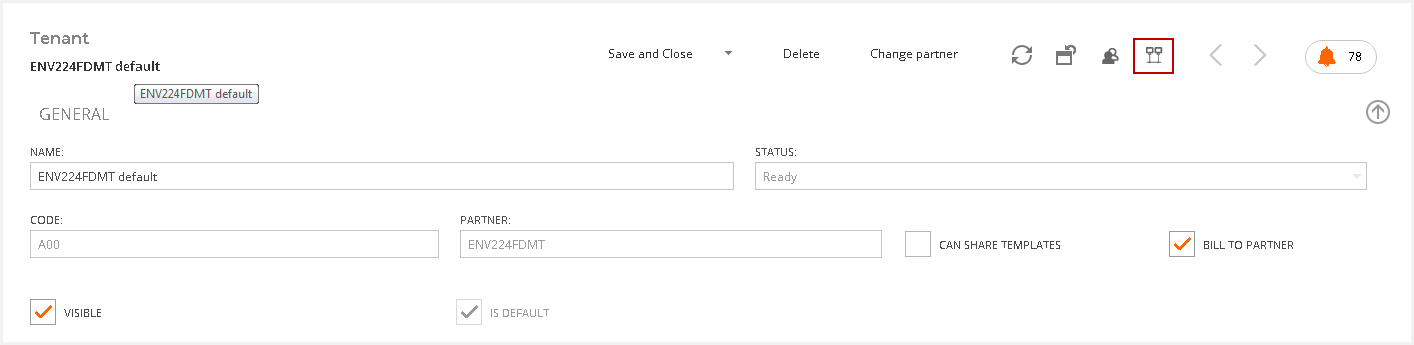
Menu actions
In the top of the page you can perform the following actions:
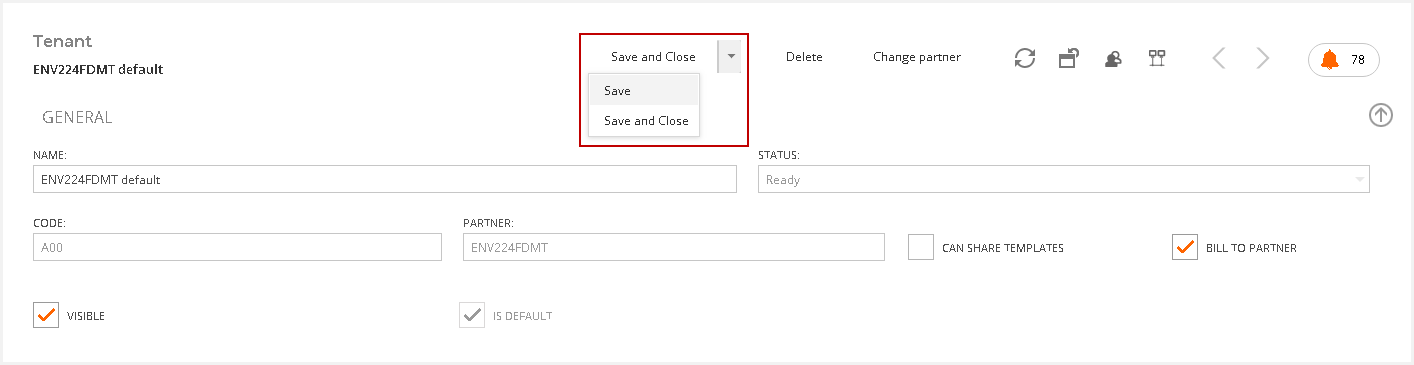
- Save: This action saves tenant status.
- Save and close: This action saves the tenant status and returns to the tenant general view.
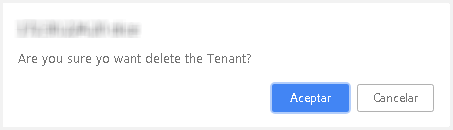
- Delete: This action deletes the visible tenant. It displays a confirmation message prior to the action.
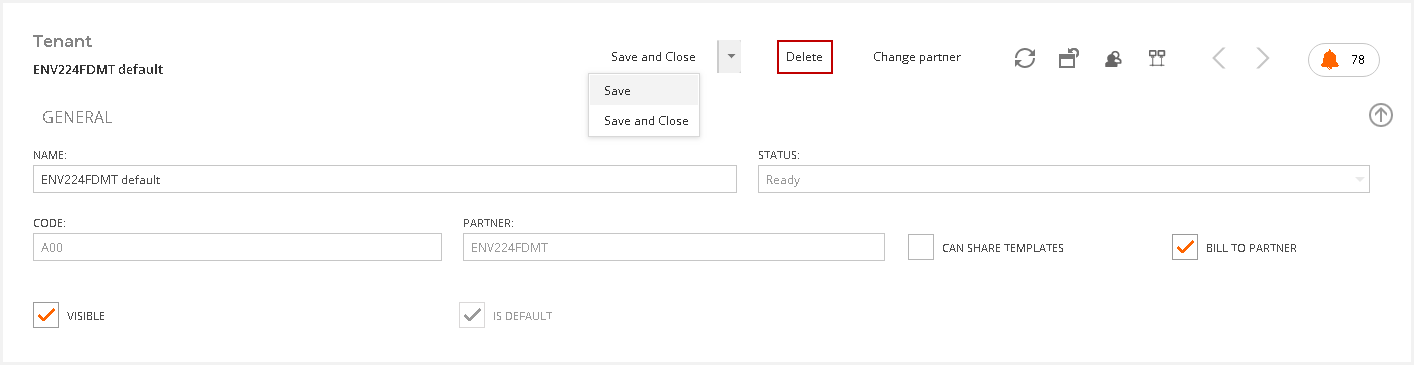
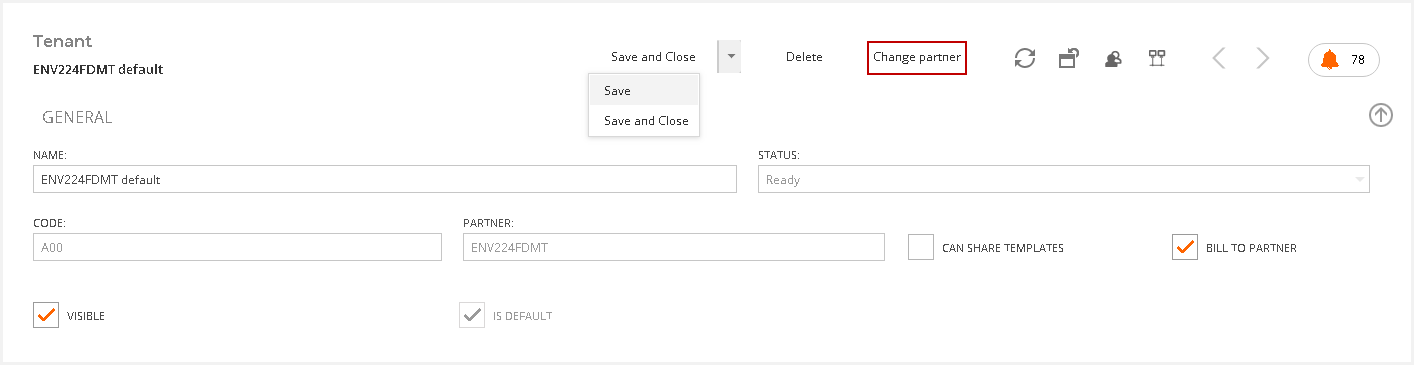
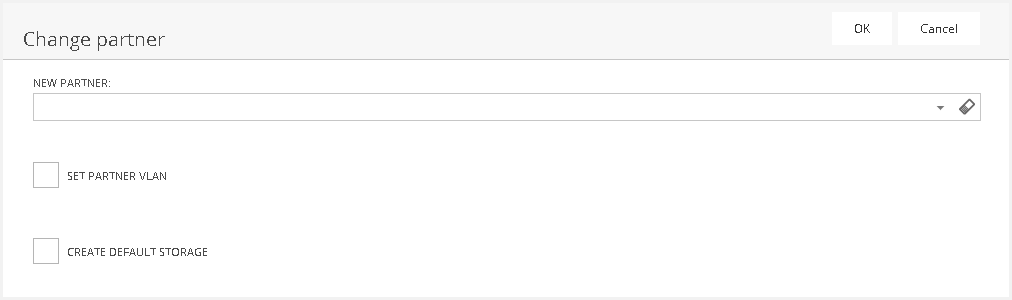
- Change partner: This opens a modal window where you can change the current tenant partner (its owner) to another existing one in the organization.
- Refresh: The refresh button updates the data in the view.
- Reset button: This updates the customized view to the default view.
- Open partner: This button opens the partner general view.
- Deploy and update the tenant infrastructure.
Tabs area in the tenant view
In the bottom of the page you can see a tabs area. In this section you can see all the elements and resources related to the tenant, and perform operations on some of them.
Users
This tab allows you to manage the tenant users.
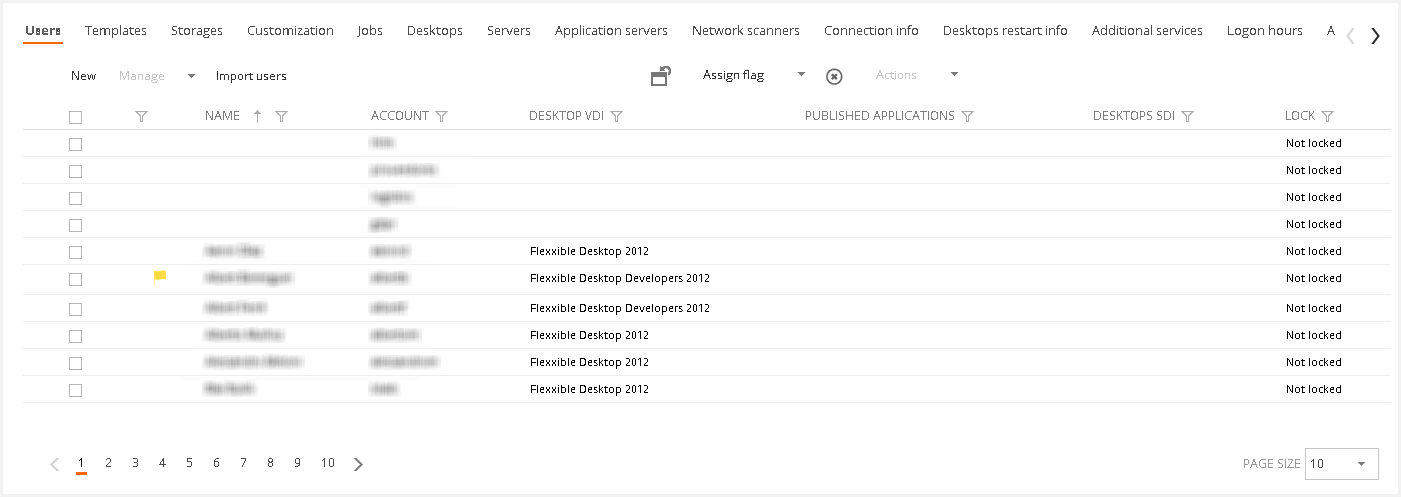
You can perform the following actions to more than one.
- Create a new user: This functionality is more detailed in the How to create a new user article.
- Manage: You can see more information in the User resources deployment and assignment article.
- Import users
- Assign flag: This function is detailed in the How to mark VIP users article.
- Delete user:
- Only from SUITE
- Deletes a tenant user from the Flexxible|SUITE database. It does not delete the related Active Directory account, but removes it from the tenant's AD groups to which it might belong.
- Disable in AD:
- Disables the related AD account, and removes it from the tenant's AD groups to which it might belong. The user is still visible in the users list and can be re-enabled later. The user's profile data is preserved.
- Access to the SUITE is disabled if it was enabled for the user.
- This action is only available if the tenant's domain registration in the “Domains” list has the “Delete users” permission checked.
- Enable in AD:
- Enables a disabled tenant user by re-enabling the related AD account, and adding it to the configured tenant's AD groups.
- Delete user and profile:
- With a previous audited confirmation, it deletes the user from the SUITE database and the related account from Active Directory.
- If configured, it may also delete the user's FSLogix profile information:
- User profile data
- Office & Windows search profile data
- Redirected folders data
- The action to take on the user's profile data when deleting is governed by the setting “DeletedUserProfileAction”.
- This action is only available if the tenant's domain registration in the “Domains” list has the “Delete users” permission checked.
- Only from SUITE
- Actions: You can perform the following actions:
- Change password at next logon
- Forces the user to change the password on next log on.
- Remove lock
- (the lock on a user is automatically set when an operation fails, so the operation is not constantly retried until the condition causing it is corrected and the lock is removed)
- Reset 2FA device
- Allows to reset the Citrix NetScaler registered device for two-factor authentication (2FA) for the user (for example if he/she has changed its mobile phone).
- This action is only visible if the tenant's domain registration with Flexxible|SUITE (the "Domains" list in the main menu) has the "Create or update user information" permission checked.
- The "2FA" column indicates with a check if the user has any registered device yet.
- To enable Citrix ADC (formerly NetScaler) two-factor authentication with Flexxible|SUITE you must specify the Active Directory attribute name where the configuration for registered devices is stored the domain registration detail view. Please note that, to use two-factor authentication, additional configuration is required for Citrix ADC.
- Change password at next logon
VDI Manager allows manage to multiple users at once.
Templates
The templates tab displays all the templates (golden images) available for the tenant. You can see a fast overview of the templates types, status and other information, and perform some actions described below.
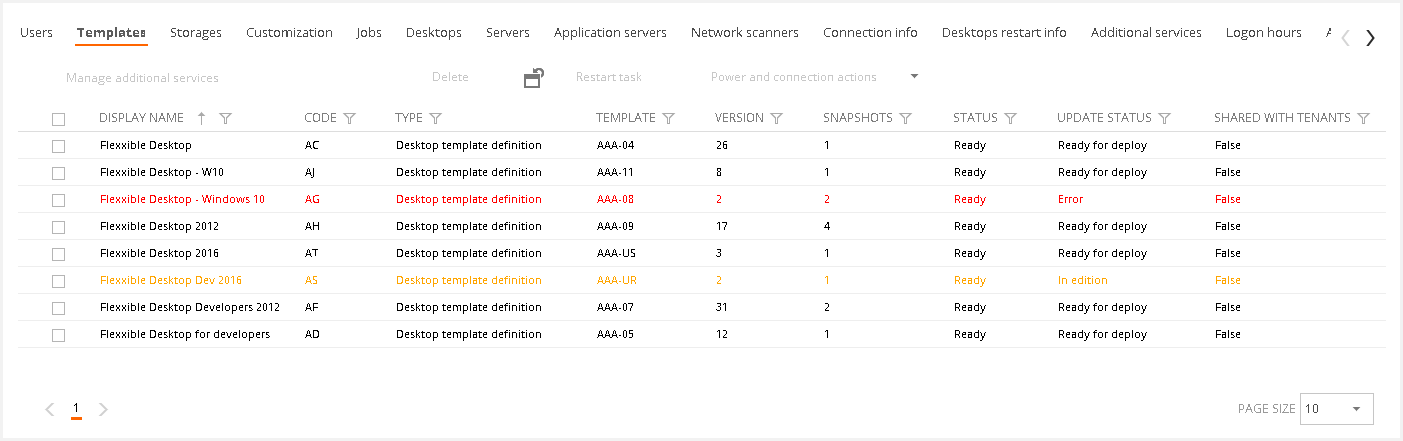
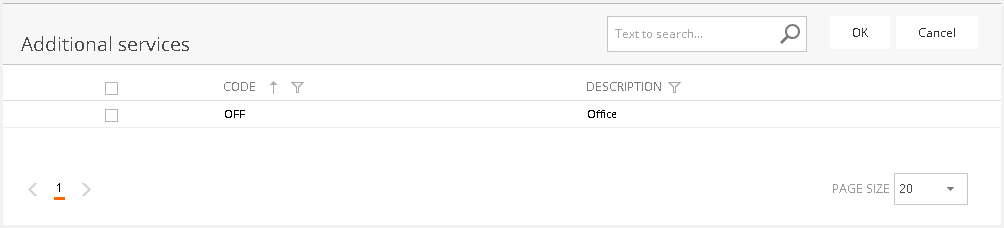
Selecting a template you can manage additional services. This will display a modal window that shows the list of additional services. You must check an additional service and press ok.
On the other hand, you can delete, restart task or perform power and connections actions.
Please visit the How to deploy a new Desktop Template the see the process of creating a new template from this point.
Storages
In this tab, you can see information on external storages, which may be available for a tenant.
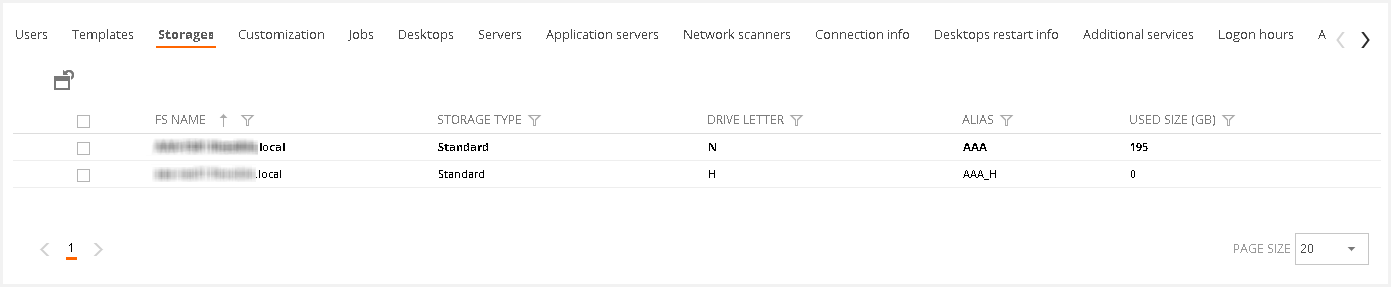
You can see the Multiple storages article for more information.
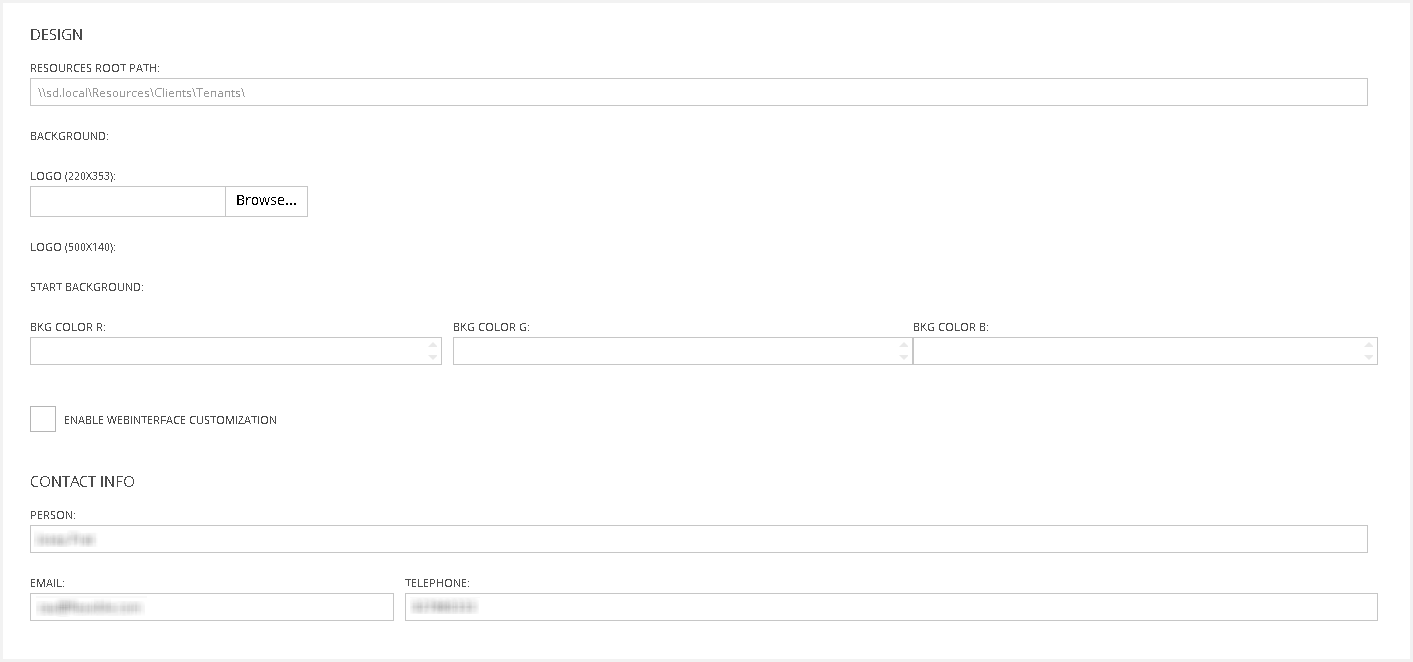
Customization
The customization tab allows you to personalize the tenant to your requirements.
You can edit the logo, the start background, and enable the login page interface customization.
On the other hand, in this view, you can set some contact info which can be useful for help desk departments.
From v.4.8, you can configure the TenantMailIsMandatory setting. This indicates if the tenant mail must be filled to be able to save the tenant. When this setting is activated (i.e. set to true), you must indicate the tenant's contact info e-mail.
Jobs
In this tab, you can see the list of jobs related with the selected tenant.

Desktops
The Desktops tab allows you to view and manage the VDIs currently available for the tenant.
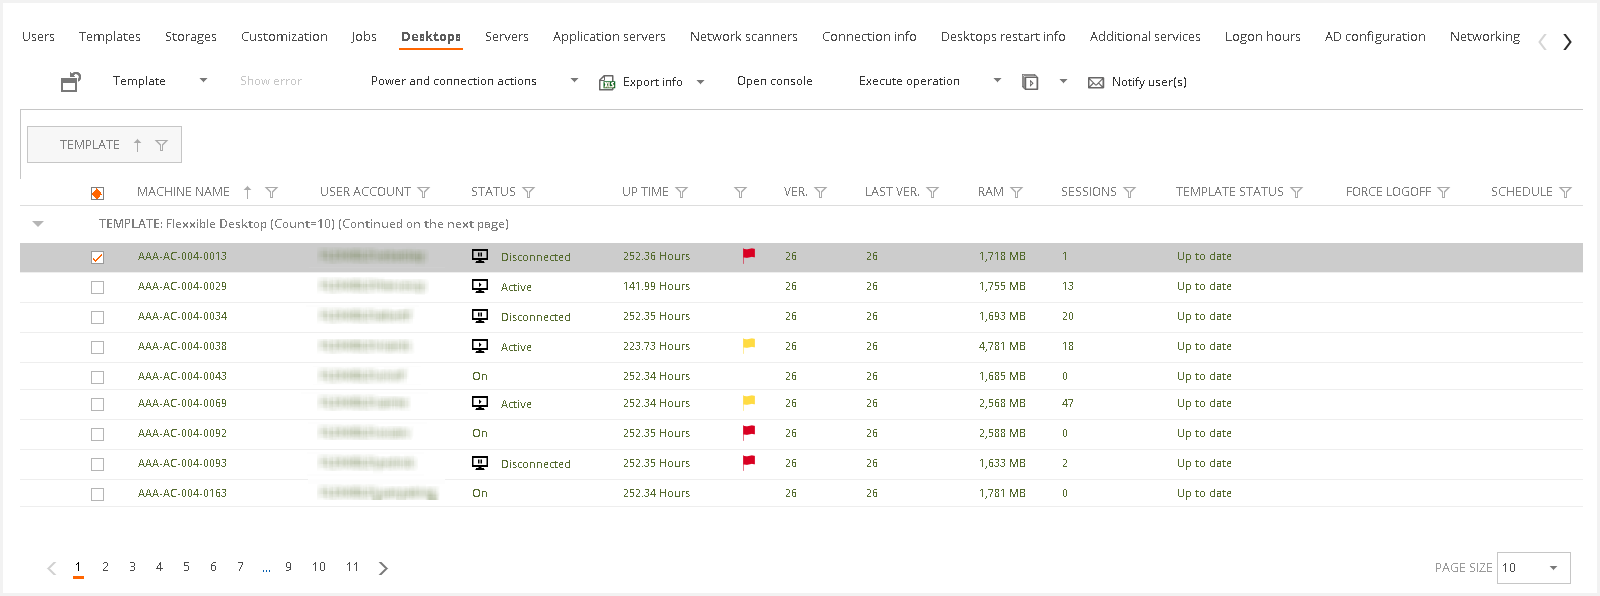
By selecting the desired desktop, you can perform any of the actions at the top of the table.
You can read more information through the following articles:
- Desktop view
- How to upgrade a VDI or AppServer to the latest version of the template
- How to deploy a new Desktop Template
Servers
The Servers tab allows you to manage the tenant servers.
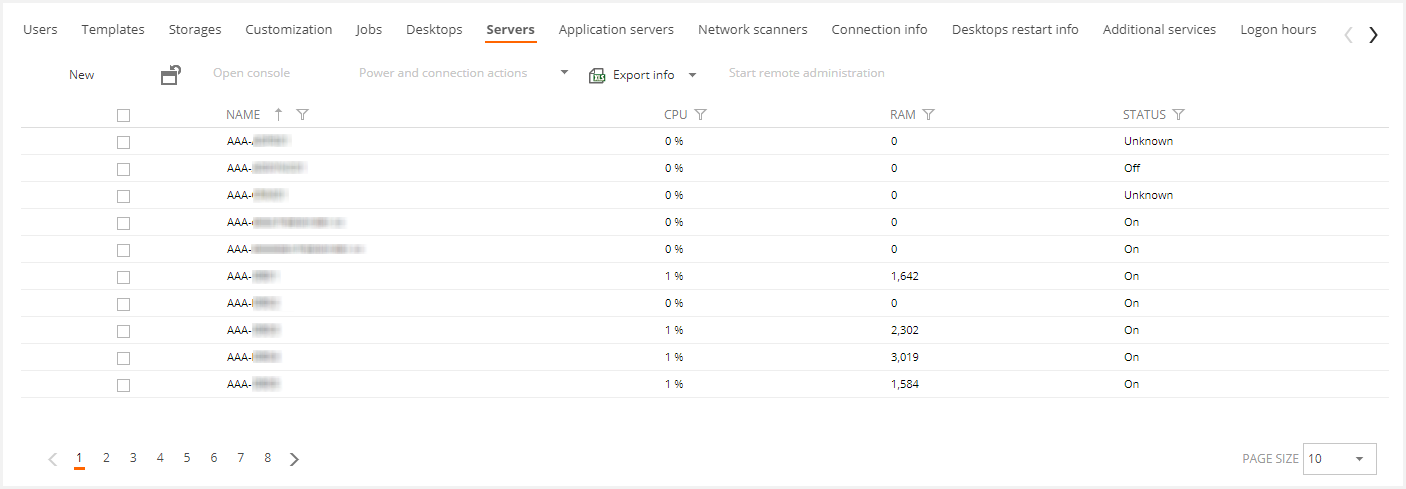
You can see the Server view article to find more information about server management.
Application servers
The Application servers tab allows you to manage the tenant application servers, which provide published apps to end-users.
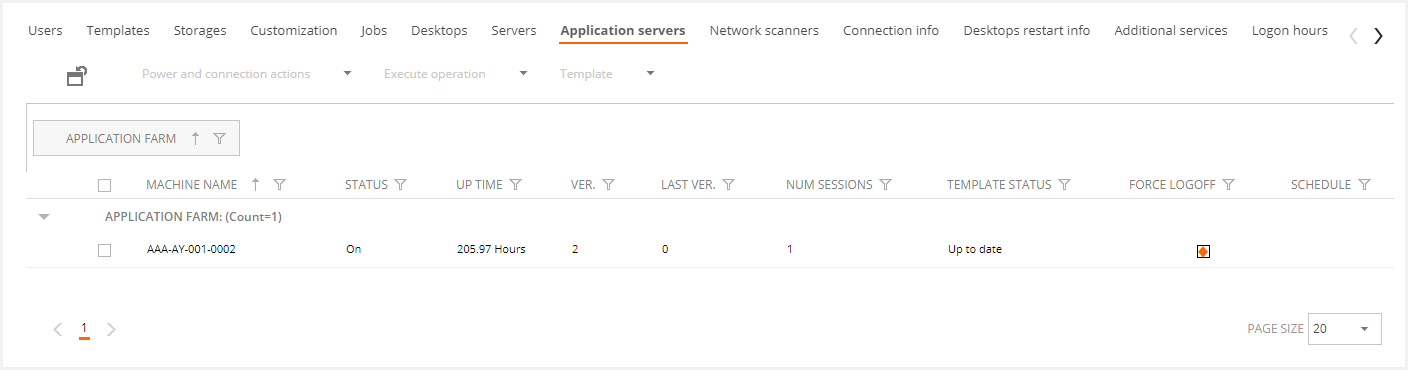
You can see the Application Server View article to find more information about the operations that you can perform in this view.
Network scanners
This tab allows configuring the scanners to automatically send the scanned documents to the defined folders within the client NAS.
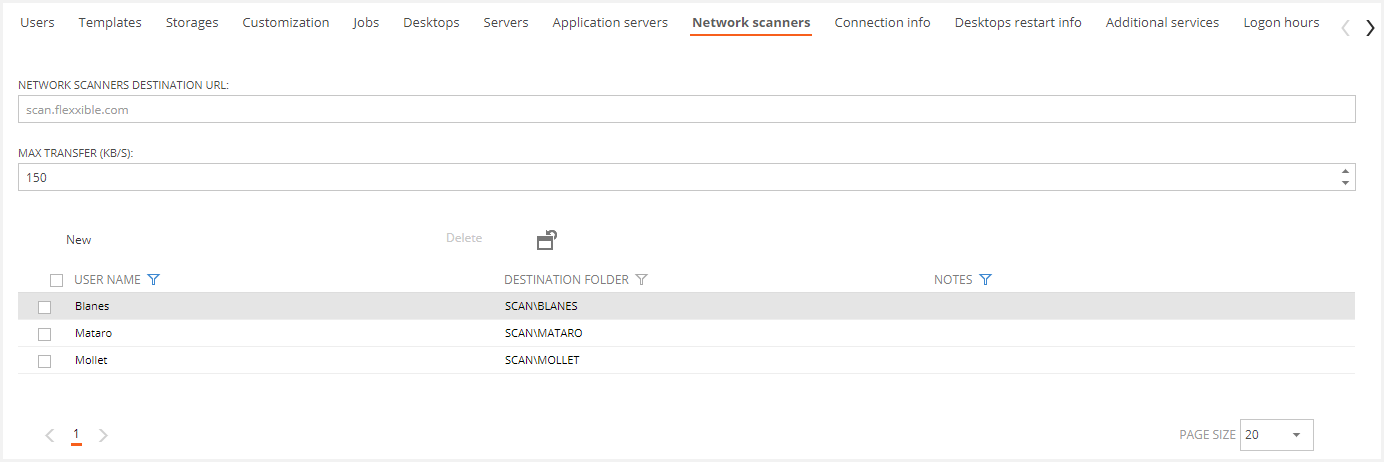
Please find more info on network scanners in the Network Scanner article.
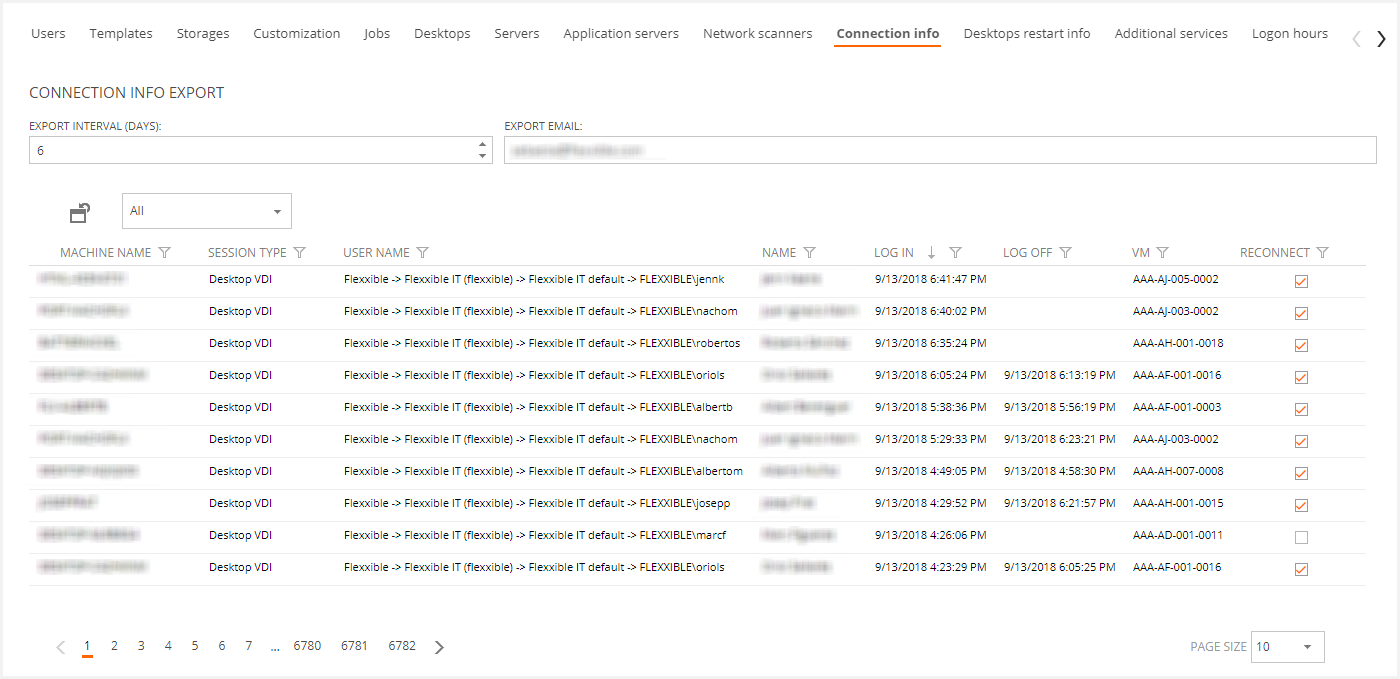
Connection info
The Connection info tab shows the user connection activity. You can configure this export of information in an export interval.
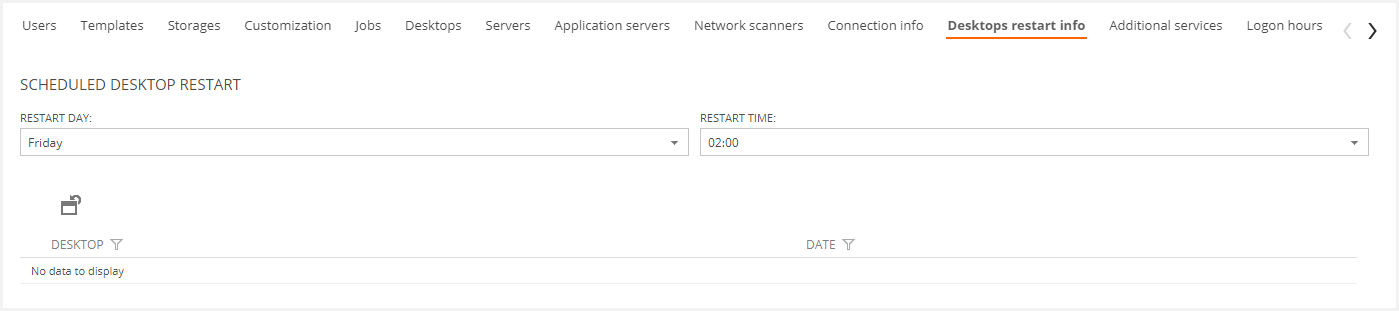
Desktops restart info
The desktop restart info tab allows you to schedule VDI restarts to be performed weekly in a selected day-time. This is useful to maintain a clean and fresh environment when users do not actively close their sessions usually. You will also be able to see when these automatic restarts where applied in the past.
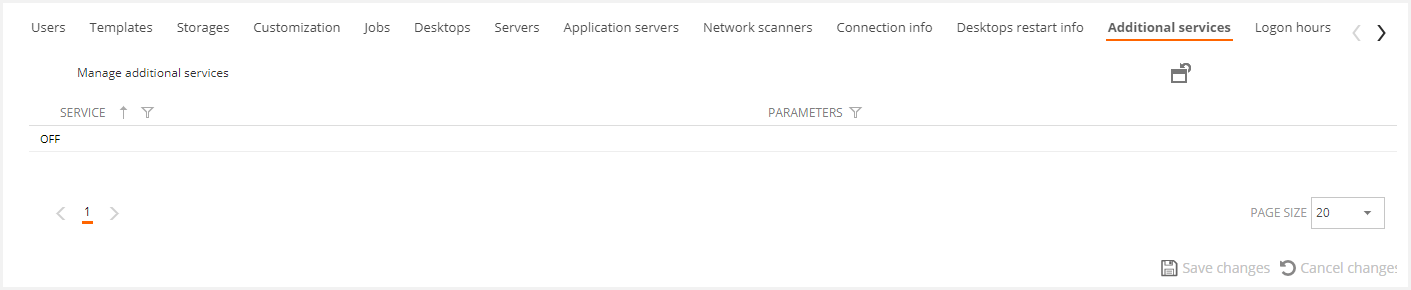
Additional services
The additional services tab shows the defined additional services and allows you adding or removing them. These additional services are useful to control extra resources or configurations applied to some elements, for example, to control costs and have auditing information available.
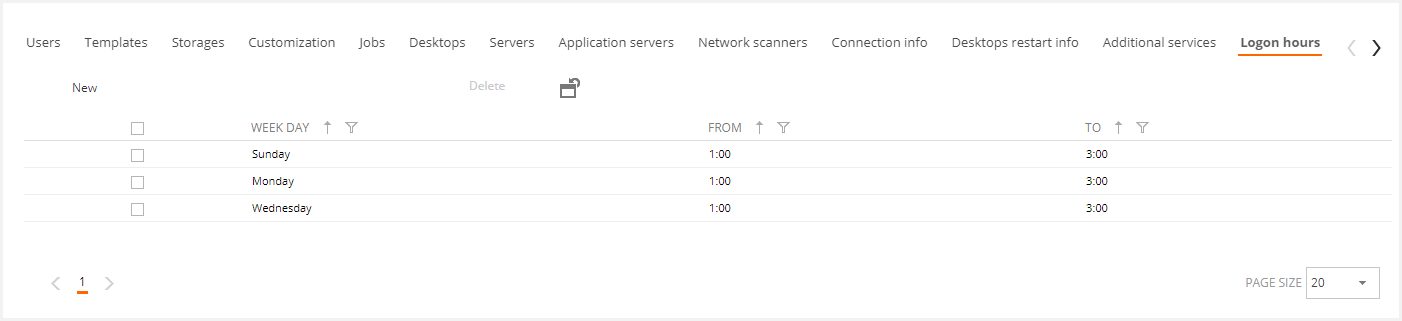
Logon hours
This tab shows and allows to configure allowed logon hours for end users. You can define a time frame for each day of the week and this will synchronize this configuration with the Active Directory of the tenant to allow users logon only within these timeframes.
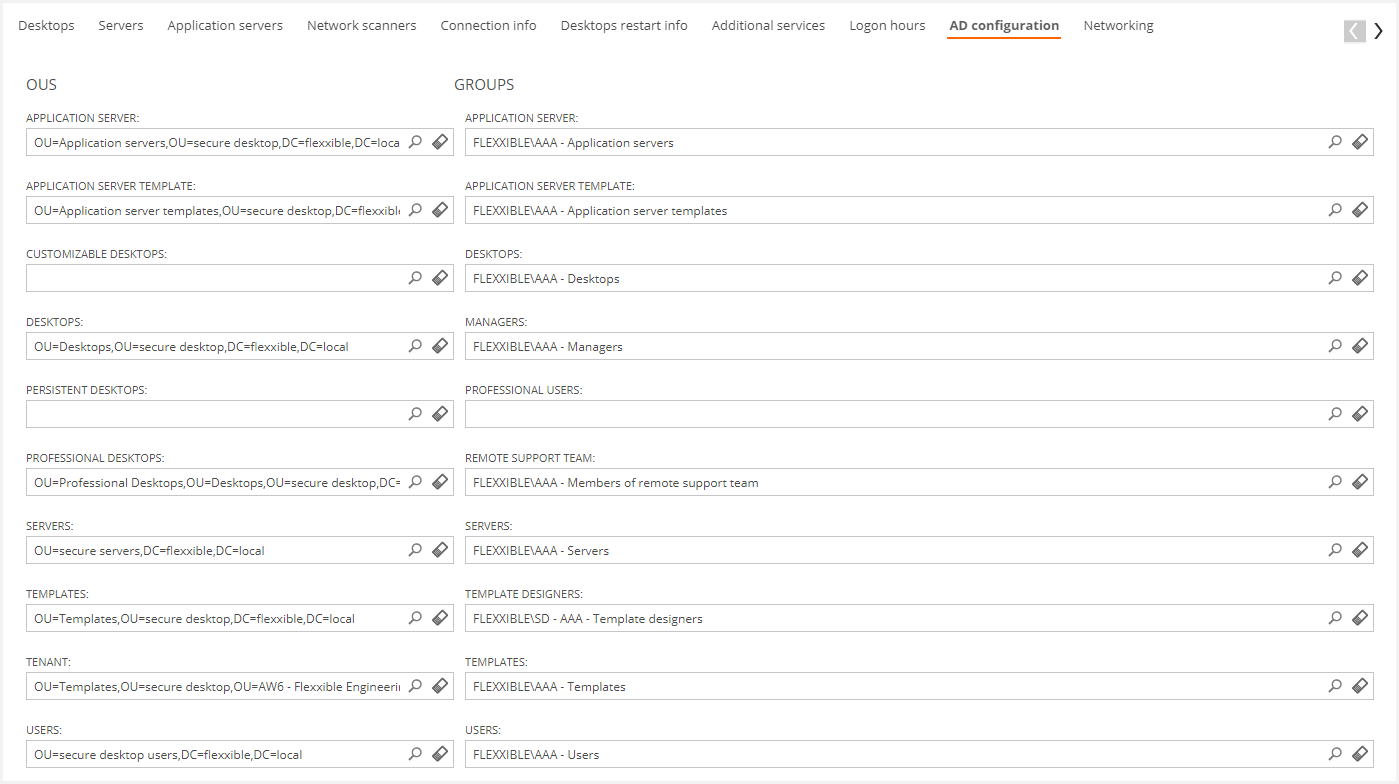
AD Configuration
The AD Configuration tab displays the OUs and Groups configuration for the current tenant.
Please visit AD Configuration to see this configuration in detail.
Networking
The Networking tab shows the Active Directory domain, VLAN and public IP information. You can modify the VLAN value if you want, but the domain cannot be modified after the tenant has been initialized.
