Requirements
- Configure Flexxible|Appliance following you can find here. Please, search the correct manufacturer and model.
- A 64GB (at least) SD card available in the appliance.
- An SD slot reader on your computer.
All Flexxible|Appliance have a device where firmware (MDT) are installed by default. Depending manufacturer and model, your appliance have Satadom device or SD card.
Burn ISO to SD card
- Connect to our repository to download the required ISO image: https://repository.flexxible.com:3443. *This repository is private. Please, contact us to provide temporary access.
- Download Rufus tool from https://rufus.ie
- Insert SD in slot on your computer.
- Open Rufus and burn ISO to a 64GB (or larger) USB drive with Rufus.
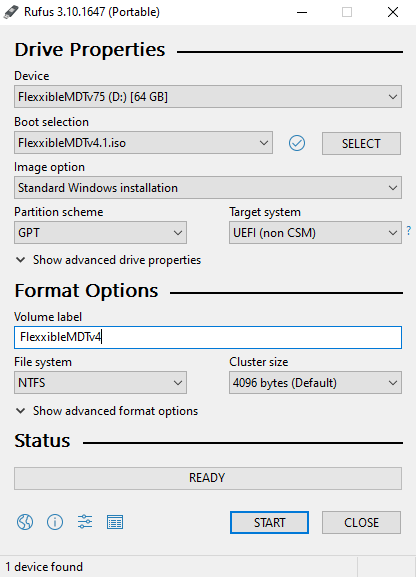
Pay attention to partition scheme and target system type, file system and especially New volume label because when you select the ISO image file, these fields may change and you should correct them
The values are:
- Partition scheme: GPT partition
- Target system: UEFI (non CSM)
- File system: NTFS
- New volume label: FlexxibleMDT+<version>. For example, FlexxibleMDTv4
Once the process is finished, you can insert SD card in Flexxible|Appliance. You can find information about how to boot from SD card or Satadom in article at top.
Burn ISO to Satadom
- Connect to our repository to download the required ISO image: https://repository.flexxible.com:3443. *This repository is private. Please, contact us to provide temporary access.
- Download Rufus tool from https://rufus.ie
- Burn ISO to a 64GB (or larger) USB drive with Rufus.
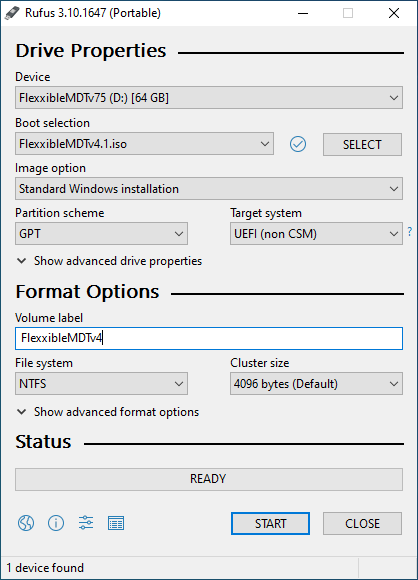
Pay attention to partition scheme and target system type, file system and especially New volume label because when you select the ISO image file, these fields may change and you should correct them
The values are:
- Partition scheme: GPT partition
- Target system: UEFI (non CSM)
- File system: NTFS
- New volume label: FlexxibleMDT+<version>. For example, FlexxibleMDTv4
Plug the USB drive to one of the nodes you want to burn SATADOM.
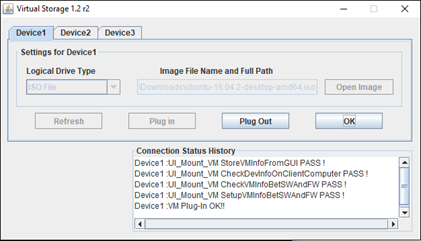
Connect to IPMI and "Plug In" Ubuntu-16.04.2-desktop-amd64.iso to Virtual Media:
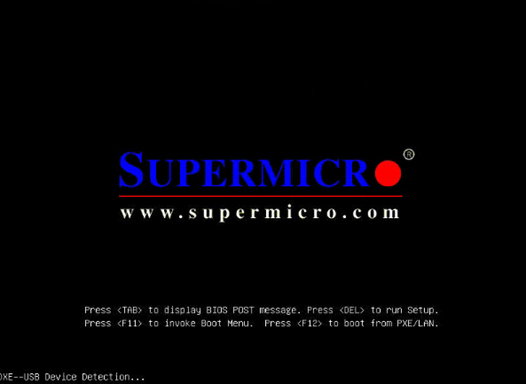
Turn on the server and press DEL to enter BIOS setup:
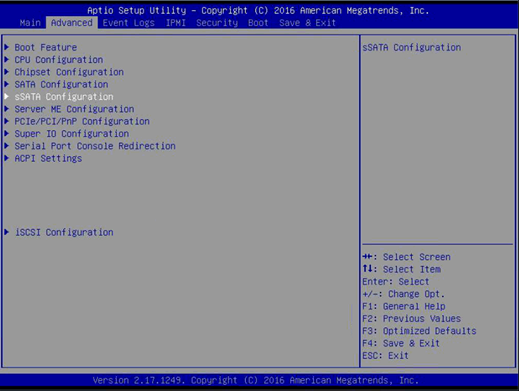
On the advanced tab, select “sSATA Configuration” and then set “sSATA Controller” to enabled
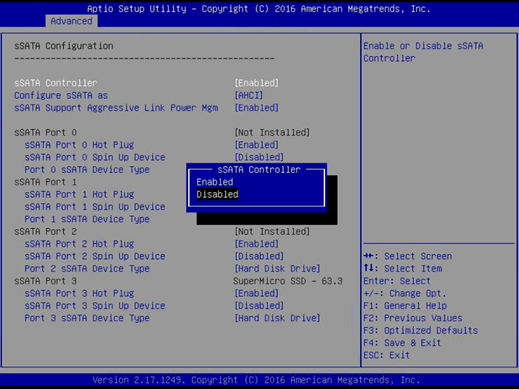
Press F4 to save and exit. This will restart the server.
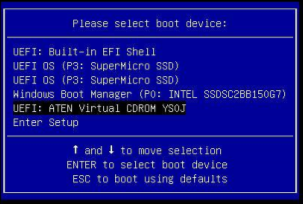
Press F11 during startup to boot from the Ubuntu image attached above:
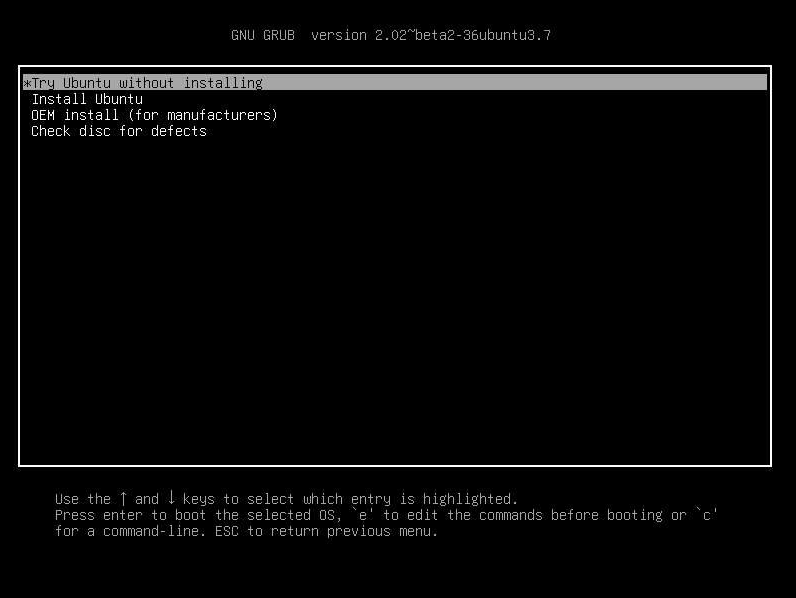
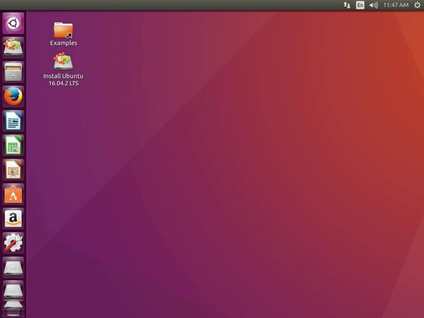
Select option Try Ubuntu without installing and press enter:
Press CTRL + ALT + T to open a terminal window and execute the commands below:
$ sudo -i
# ls -altr /dev/disk/by-label
# dd bs=4M if=/dev/sdg of=/dev/sda status=progress
# reboot
The sudo command to get root privileges.
The “ls” command show us all disks and we need to do this to know which device is assigned to the USB drive we plugged. We must find the device name (/dev/sdg, /dev/sdh…) corresponding to the device labeled as the “volume label” we set when we burned the USB drive (the label you configured in Rufus “FlexxibleMDTvX”).
The “dd” command dumps all content of input file (if=/dev/sdg) which is the device we searched earlier to output file (of=/dev/sda) which is the device assigned to SATADOM.
Finally, we reboot the server and unplug USB drive.
